
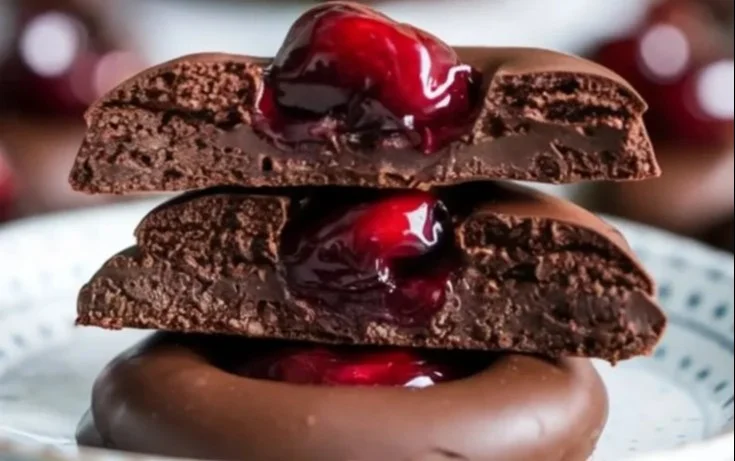
If you are looking for a delicious and fun treat, these Chocolate Cherry Thumbprint Cookies are perfect! They are soft, chocolatey, and filled with a sweet cherry surprise. Not only are they easy to make, but they also look impressive on any dessert table. You’ll love how the chocolate coating and cherry filling blend together in every bite. Best of all, you can whip them up without needing more than a few simple ingredients. For even more tasty options, check out simple pantry recipes.
Why Make This Recipe
- These cookies are a delightful mix of chocolate and cherry flavors.
- They are simple to prepare and perfect for any baking skill level.
- They make great gifts for friends, family, or holiday gatherings.
- The combination of textures is sure to please anyone who tries them!
How to Make Chocolate Cherry Thumbprint Cookies Recipe
This cookie recipe involves making a soft dough, shaping it into balls, and creating a small thumbprint in each one. After baking, you coat the cookies in melted chocolate and fill the center with cherry pie filling, making them both fun to make and to eat. You may also find 15 Asian Slow Cooker Recipes With Bold Flavors useful.
Ingredients
- 1 cup (226g) unsalted butter, softened
- ¾ cup (150g) granulated sugar
- 1 large egg yolk
- 1 teaspoon vanilla extract
- 1 ¼ cups (160g) all-purpose flour
- ½ cup (40g) unsweetened cocoa powder
- ¼ teaspoon salt
- FOR THE CHOCOLATE COATING:
- 8 oz (225g) semi-sweet or dark chocolate, finely chopped
- 1 teaspoon coconut oil or vegetable shortening
- FOR THE CHERRY FILLING:
- 1 cup cherry pie filling (or about 20 maraschino cherries, drained and patted dry)
Directions
MAKE THE COOKIE DOUGH: In a large mixing bowl, cream the butter and sugar together until light and fluffy, about 2 minutes with a hand mixer. Add the egg yolk and vanilla extract, mixing until fully combined. In a separate bowl, whisk together the flour, cocoa powder, and salt. Gradually add the dry ingredients to the wet ingredients, stirring until a soft dough forms. If the dough is too sticky, chill it in the refrigerator for 15 minutes before shaping.
SHAPE AND BAKE THE COOKIES: Preheat the oven to 350°F (175°C). Line a baking sheet with parchment paper. Scoop out small portions of dough and roll them into 1-inch balls. Place them on the prepared baking sheet, spacing them about 2 inches apart. Use your thumb or the back of a teaspoon to gently press an indentation into the center of each dough ball. Bake for 8-10 minutes, or until the edges look set but the centers remain slightly soft. Let the cookies rest on the baking sheet for a few minutes before transferring them to a wire rack to cool completely.
COAT THE COOKIES IN CHOCOLATE: While the cookies cool, melt the chocolate. Place the chopped chocolate and coconut oil in a heatproof bowl and microwave in 20-second intervals, stirring between each, until smooth. Dip each cookie completely into the melted chocolate, allowing the excess to drip off before placing them back onto parchment paper. Alternatively, spoon chocolate over each cookie instead of dipping. Let the chocolate set at room temperature or refrigerate for faster setting.
ADD THE CHERRY FILLING: Once the chocolate is firm, spoon a small amount of cherry pie filling into the indentation of each cookie. If using maraschino cherries, press one into the center, allowing the juices to lightly coat the surrounding chocolate.
How to Serve Chocolate Cherry Thumbprint Cookies Recipe
These cookies pair beautifully with a cup of tea or coffee. They are also great for dessert platters at parties or special occasions. You could even serve them with a scoop of vanilla ice cream for a delightful twist!
How to Store Chocolate Cherry Thumbprint Cookies Recipe
Store the cookies in an airtight container at room temperature for up to a week. You can also refrigerate them for longer freshness. To reheat, just warm them in the microwave for a few seconds to soften the chocolate again.
Tips to Make Chocolate Cherry Thumbprint Cookies Recipe
- Make sure your butter is softened to room temperature for easy mixing.
- Don’t skip chilling the dough if it’s too sticky; it helps in shaping.
- Experiment with different fillings like raspberry or strawberry for variety.
- Use high-quality chocolate for the best flavor and coating.
Variations
- Try adding crushed nuts to the dough for a crunchy texture.
- Use almond extract instead of vanilla for a different flavor.
- Top with colorful sprinkles for a festive touch.
FAQs
- Can I use margarine instead of butter? Yes, but it may alter the texture slightly.
- What can I substitute for cherry filling? You can use any pie filling or jam you like.
- How do I know when the cookies are done baking? The edges should be set, and the centers will look soft but not wet.
Conclusion
If you love rich chocolate and sweet cherry flavors, you will enjoy these Chocolate Cherry Thumbprint Cookies. For a more in-depth look at these treats, visit this recipe or check out another variation at 3 Yummy Tummies for different ideas!
Chocolate Cherry Thumbprint Cookies
Ingredients
Method
- In a large mixing bowl, cream the butter and sugar together until light and fluffy, about 2 minutes with a hand mixer.
- Add the egg yolk and vanilla extract, mixing until fully combined.
- In a separate bowl, whisk together the flour, cocoa powder, and salt.
- Gradually add the dry ingredients to the wet ingredients, stirring until a soft dough forms.
- If the dough is too sticky, chill it in the refrigerator for 15 minutes before shaping.
- Preheat the oven to 350°F (175°C). Line a baking sheet with parchment paper.
- Scoop out small portions of dough and roll them into 1-inch balls.
- Place them on the prepared baking sheet, spacing them about 2 inches apart.
- Use your thumb or the back of a teaspoon to gently press an indentation into the center of each dough ball.
- Bake for 8-10 minutes, until the edges look set but the centers remain slightly soft.
- Let the cookies rest on the baking sheet for a few minutes before transferring them to a wire rack to cool completely.
- While the cookies cool, melt the chocolate and coconut oil together.
- Place the chopped chocolate and coconut oil in a heatproof bowl and microwave in 20-second intervals, stirring between each, until smooth.
- Dip each cookie completely into the melted chocolate, allowing the excess to drip off before placing them back onto parchment paper.
- Let the chocolate set at room temperature or refrigerate for faster setting.
- Once the chocolate is firm, spoon a small amount of cherry pie filling into the indentation of each cookie.
- If using maraschino cherries, press one into the center, allowing the juices to lightly coat the surrounding chocolate.