

Introduction
The humble Dutch oven is the unsung hero of the kitchen, capable of transforming simple, affordable ingredients into deeply flavorful, comforting meals with minimal effort. Its ability to retain heat, sear, braise, and bake makes it an incredibly versatile tool for everything from weeknight dinners to weekend feasts. Today, we’re embracing the art of simple, satisfying cooking with a collection of easy dutch oven recipes designed to save you time and money. Get ready to discover the joy of creating hearty, one-pot wonders that are the epitome of budget dutch oven meals.
Table of Contents
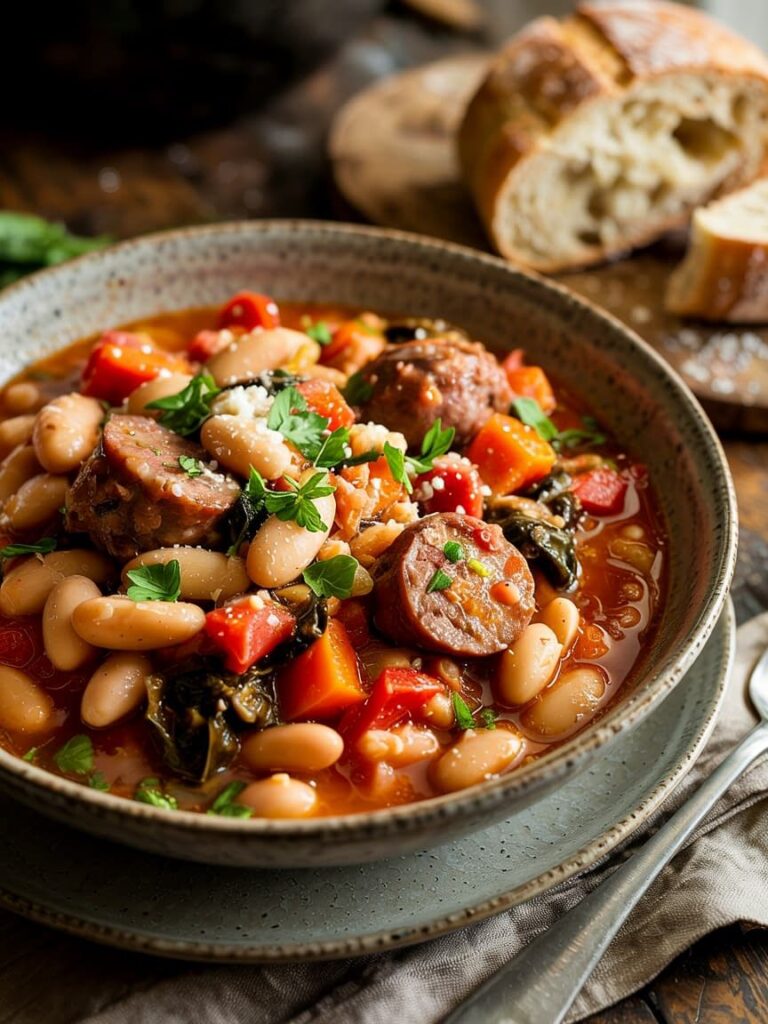
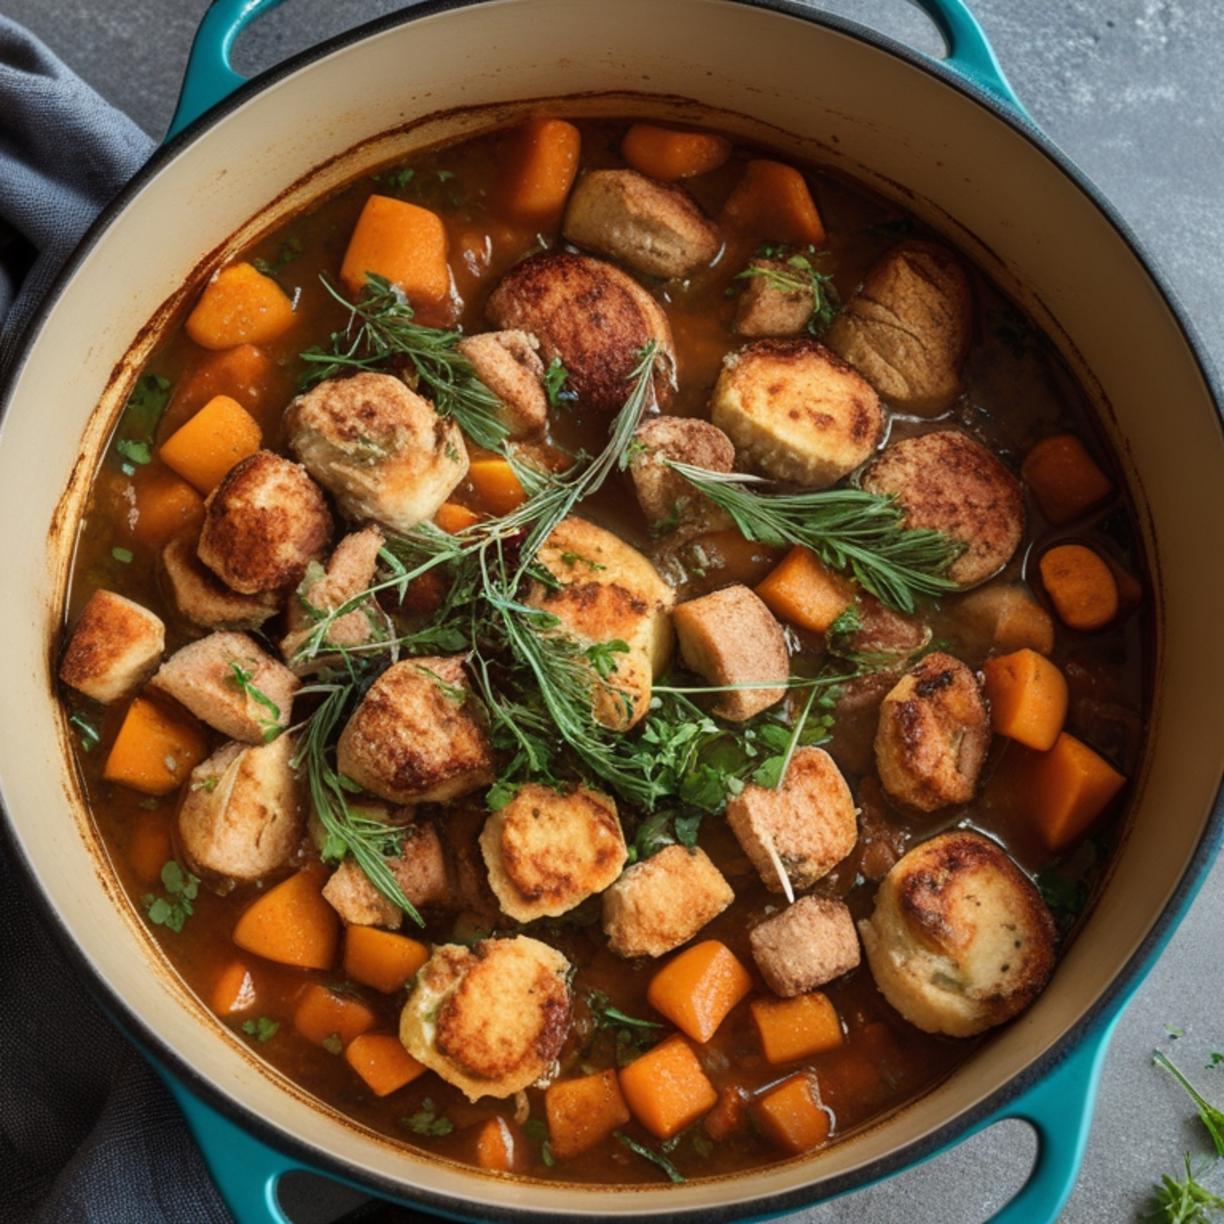
Hearty Tuscan White Bean & Sausage Stew
Ingredients
- 1 tablespoon olive oil
- 1 pound Italian sausage (sweet or spicy), casings removed
- 1 medium yellow onion, diced
- 3 medium carrots, peeled and diced
- 3 cloves garlic, minced
- 2 (15-oz) cans cannellini beans, drained and rinsed
- 1 (14.5-oz) can diced tomatoes, undrained
- 4 cups low-sodium chicken broth
- 2 teaspoons Italian seasoning
- 1 large bunch of kale, stems removed and leaves torn
- Salt and freshly ground black pepper to taste
- Grated Parmesan cheese, for serving
Step-by-Step Instructions

1. Heat the olive oil in your Dutch oven over medium-high heat. Add the sausage, breaking it up with a spoon, and cook until browned, about 5-7 minutes. Use a slotted spoon to transfer the sausage to a plate, leaving the drippings in the pot.
2. Add the diced onion and carrots to the pot. Cook, stirring occasionally, until softened, about 5-6 minutes. Add the garlic and cook for 1 more minute until fragrant.
3. Return the browned sausage to the pot. Stir in the cannellini beans, diced tomatoes with their juices, chicken broth, and Italian seasoning. Bring to a boil.
4. Reduce heat to low, cover, and simmer for 20 minutes to allow the flavors to meld.
5. Stir in the torn kale leaves and cook until wilted, about 5 minutes. Season generously with salt and pepper.
6. This is a perfect example of how easy dutch oven recipes come together. The Dutch oven’s even heat distribution is key for developing the stew’s rich flavor base, making it one of the most satisfying budget dutch oven meals you can make.
Tips & Variations
- For a lighter version, use chicken or turkey sausage.
- Substitute Swiss chard or spinach for the kale.
- Add a Parmesan rind to the pot while simmering for an extra layer of umami depth.
- For a creamy finish, stir in 1/4 cup of heavy cream or half-and-half just before serving.
Serving & Storage

Serve this stew in deep bowls topped with a generous sprinkle of Parmesan cheese and crusty bread on the side for dipping. Allow any leftovers to cool completely before storing in an airtight container in the refrigerator for up to 4 days. The flavors improve overnight! This stew also freezes beautifully for up to 3 months.
Nutritional Benefits
This stew is packed with fiber and protein from the beans and sausage, keeping you full and satisfied. Kale is a nutritional powerhouse, loaded with vitamins A, C, and K, as well as antioxidants and iron.
Common Mistakes to Avoid
- Overcrowding when browning sausage: Cook the sausage in batches if necessary to ensure proper browning, which builds flavor.
- Skipping the veggie sauté: Don’t rush softening the onions and carrots; this step creates a sweet flavor foundation.
- Forgetting to season at the end: Canned beans and broth contain varying salt levels. Always taste and adjust seasoning with salt and pepper after the stew is fully assembled.
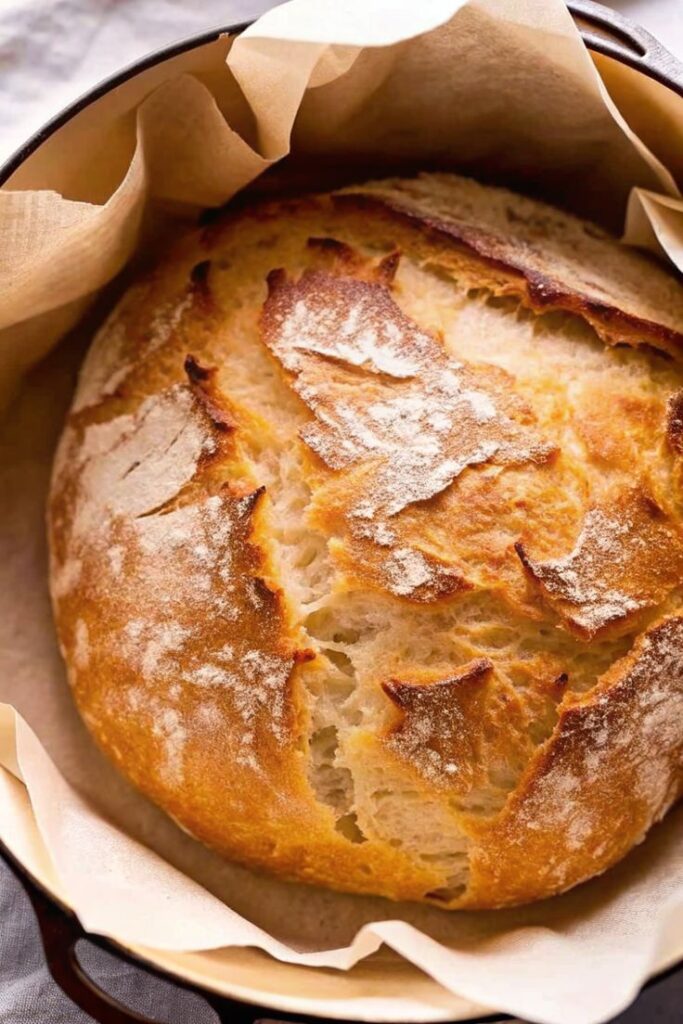
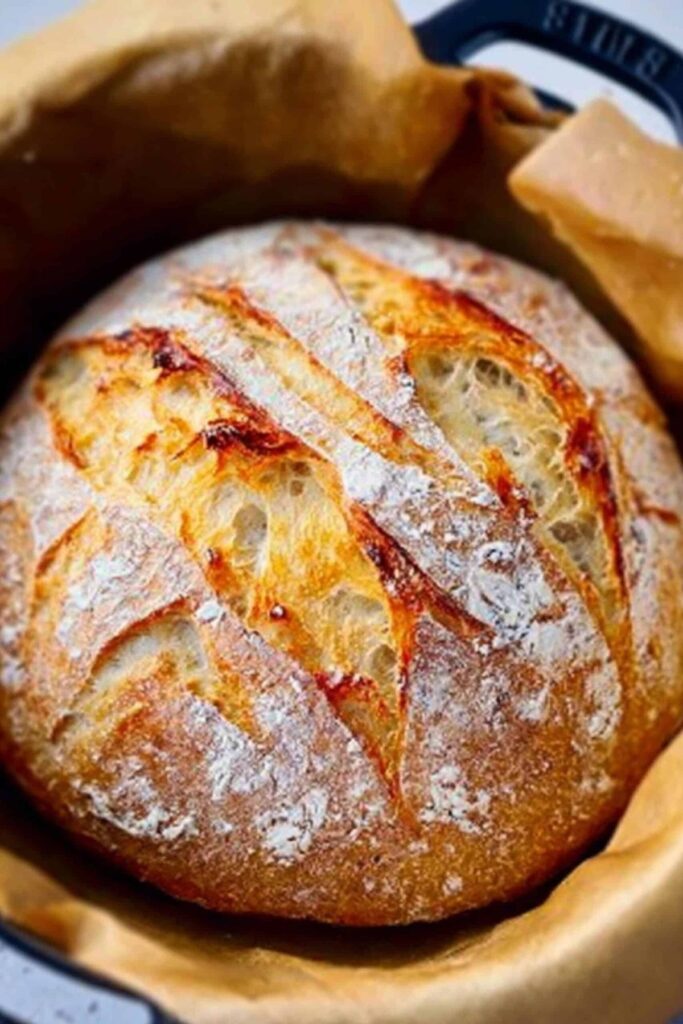
No-Knead Dutch Oven Crusty Bread

Ingredients
- 3 cups (360g) all-purpose flour, plus more for dusting
- 2 teaspoons kosher salt
- 1/2 teaspoon active dry yeast
- 1 1/2 cups (360ml) warm water (about 110°F/43°C)
Step-by-Step Instructions
1. In a large bowl, whisk together the flour, salt, and yeast. Add the warm water and stir with a wooden spoon until a shaggy, sticky dough forms. It will look messy.
2. Cover the bowl tightly with plastic wrap and let it rest at room temperature for 12-18 hours. The dough will become bubbly and roughly double in size.
3. Place your empty Dutch oven (with the lid on) into your cold oven. Preheat the oven to 450°F (230°C). Let the Dutch oven heat for 30 minutes once the oven reaches temperature.
4. While the pot heats, turn the dough out onto a well-floured surface. Gently shape it into a rough ball by folding the edges toward the center. Place it on a piece of parchment paper.
5. Carefully remove the hot Dutch oven from the oven. Using the parchment as a sling, lower the dough ball into the pot. Cover with the lid.
6. Bake covered for 30 minutes. Remove the lid and bake for an additional 15-20 minutes, until the bread is deeply golden brown and sounds hollow when tapped.
7. Transfer the bread to a wire rack and let it cool completely before slicing. This foolproof method is the secret behind countless easy dutch oven recipes for artisan-style bread. For mere pennies per loaf, it’s the ultimate proof that incredible budget dutch oven meals can start with homemade bread.
Tips & Variations
- Add 1 teaspoon of dried rosemary or thyme to the dry ingredients for a herby loaf.
- For a whole wheat version, substitute 1 cup of all-purpose flour with whole wheat flour.
- Sprinkle the top of the dough with sesame seeds, oats, or everything bagel seasoning before baking for extra texture and flavor.
Serving & Storage
Serve this bread warm with butter, olive oil and balsamic vinegar, or alongside soups and stews. Store the completely cooled bread in a paper bag at room temperature for 1-2 days for best texture. For longer storage, wrap tightly and freeze for up to 3 months. Thaw and re-crisp in a warm oven.
Nutritional Benefits
Homemade bread allows you to control the ingredients, avoiding preservatives and additives. While it’s a carbohydrate source, pairing it with protein- and fiber-rich foods like the Tuscan Stew creates a balanced meal.
Common Mistakes to Avoid
- Using water that’s too hot: Water over 130°F can kill the yeast. Aim for comfortably warm bath water temperature.
- Skipping the preheat: The Dutch oven must be piping hot to create the initial oven spring and crackly crust.
- Cutting the bread hot: The interior is still setting as it cools. Slicing too soon results in a gummy texture.
Final Conclusion
From a soul-warming, protein-packed stew to an impressively crusty loaf of bread, your Dutch oven is the key to unlocking a world of flavor with minimal fuss and maximum reward. These recipes prove that incredible, nourishing food doesn’t require expensive ingredients or complicated techniques. We hope these easy dutch oven recipes inspire you to dust off your pot and experience the simple joy of creating delicious budget dutch oven meals for yourself and your loved ones. Happy cooking!
FAQs
Can I use a Dutch oven on a glass-top stove?
Yes, most modern enameled Dutch ovens have smooth, flat bottoms that are perfectly safe for glass-top ranges. Always lift the pot to move it; never slide it across the surface to prevent scratching.
What’s the difference between a Dutch oven and a slow cooker?
A Dutch oven conducts and retains heat exceptionally well on the stovetop and in the oven, allowing you to sear, sauté, braise, and bake all in one vessel. A slow cooker only provides low, moist heat over a long period and cannot achieve the browning (Maillard reaction) crucial for flavor development.
Do I need to season an enameled Dutch oven?
No. Enameled cast iron (like Le Creuset or Staub) has a glass-coated surface that does not require seasoning. Only bare cast iron Dutch ovens need to be seasoned to create a natural non-stick patina.
Can I bake desserts in a Dutch oven?
Absolutely! Dutch ovens are fantastic for baking cobblers, crisps, deep-dish pies, and even cakes. The heavy lid traps steam, creating a beautifully moist environment for baking.
How do I clean and care for my Dutch oven?
For enameled pots, allow them to cool before washing. Use warm, soapy water and a soft sponge or brush. Avoid abrasive scouring pads. For tough, stuck-on food, simmer a little water in the pot for 10 minutes to loosen it. Always dry thoroughly.