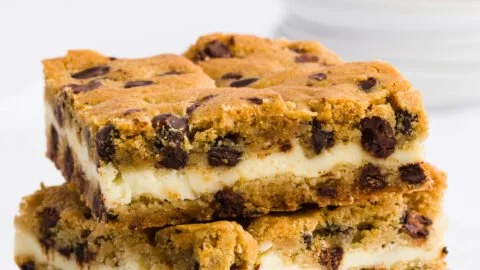

If you are looking for a tasty treat that combines the rich flavors of cheesecake and chocolate chip cookies, you’ve come to the right place! These Chocolate Chip Cheesecake Bars are simple to make and are perfect for any occasion. With their creamy cheesecake filling and a cookie crust topped with more cookie dough, they are sure to please anyone with a sweet tooth. Plus, they are easy to serve and share! You may also find Bakery Style Chocolate Chip Scones useful.
Why Make This Recipe
- These bars are a delightful mix of two favorite desserts: cookies and cheesecake.
- They are easy to prepare and require very little time in the kitchen.
- You can customize the flavors by adding different toppings or variations.
How to Make Chocolate Chip Cheesecake Bars
This recipe combines a cookie base with a creamy cheesecake filling and adds cookie dough on top. With just a few steps, you can create a sweet treat that is enjoyable for everyone. You will just need to gather your ingredients and follow the simple directions. You may also find Best Chocolate Chip Pecan Cookies useful.
Ingredients
- 40 oz Refrigerated chocolate chip cookie dough
- 16 oz Cream cheese
- 1 egg
- 1/4 cup Granulated sugar
- 1/2 teaspoon vanilla
- 1 teaspoon lemon juice (optional)
Directions
Preheat oven to 350 degrees F. Place the cookie dough in the freezer for a few hours. Allow cream cheese to soften. Sit one large egg out until it is room temperature. Line a 13×9″ pan with parchment paper or non-stick foil. Slice half the cookie dough into 1/4″ slices and place it in the bottom of the lined pan. Press the cookie dough into the pan. Bake in a preheated 350-degree oven for 10 minutes. While the “crust” is baking, beat cream cheese, egg, sugar, and vanilla together with an electric mixer on medium speed. Spread the cheesecake batter over the crust as soon as it comes out of the oven. Slice the remaining cookie dough and place it on the top of the cheesecake layer. Return the pan to the oven and bake for 35 to 40 minutes. Cool then, refrigerate before serving.
How to Serve Chocolate Chip Cheesecake Bars
These bars can be served straight from the fridge, cut into squares. For a fun twist, plate them with whipped cream or a drizzle of chocolate sauce on top. You can also pair them with a scoop of vanilla ice cream for an extra special dessert.
How to Store Chocolate Chip Cheesecake Bars
Store these bars in an airtight container in the refrigerator for up to five days. If you’d like to enjoy them later, they can be frozen. Just wrap them tightly in plastic wrap and place them in a freezer-safe container. To enjoy, simply thaw them in the fridge.
Tips to Make Chocolate Chip Cheesecake Bars
- For a richer flavor, try adding a bit of chocolate or caramel sauce to the cheesecake mixture.
- Ensure the cream cheese is well-softened for a smooth filling.
- If you want a crunch, consider sprinkling some nuts or crushed cookies on top before baking.
- You can make these bars ahead of time and keep them refrigerated until you are ready to serve.
Variations
- Use peanut butter cookie dough instead of chocolate chip for a nutty flavor.
- Add mini chocolate chips to the cheesecake layer for extra chocolatey goodness.
- Top the cheesecake layer with fruit, such as strawberries or blueberries, for a refreshing twist.
FAQs
- Can I use homemade cookie dough? Yes, homemade cookie dough works great for this recipe!
- Is it necessary to refrigerate before serving? Yes, chilling helps set the cheesecake filling.
- Can I use a different type of cheese for the filling? Cream cheese is best, but mascarpone can be used for a different flavor.
Conclusion
Chocolate Chip Cheesecake Bars are a delightful dessert that everyone will love. If you’re looking for more dessert inspiration, you might want to try Chocolate Chip Cookie Cheesecake Bars – Mom On Timeout or explore a delicious variation with Chocolate Chip Cheesecake Bars – Recipe Girl. Enjoy your baking adventure!