


Are you ready to transform your home cooking without spending hours in the kitchen? I’ve gathered 19 easy and delicious recipes that not only simplify meal prep but also elevate your culinary skills. From the irresistible Baked Garlic Parmesan Sweet Potato Wedges to the creamy indulgence of Cranberry Brie Stuffed Chicken, this comprehensive guide promises something for everyone. You won’t just find recipes; you’ll discover step-by-step tutorials that make cooking enjoyable and stress-free. Join me on this flavorful journey and get ready to impress your family and friends with mouthwatering dishes that are as fun to make as they are to eat!
1. Baked Garlic Parmesan Sweet Potato Wedges

If you love sweet potatoes and garlic, you will adore these Baked Garlic Parmesan Sweet Potato Wedges. They are crispy, flavorful, and super easy to make. Whether for a snack, appetizer, or side dish, these wedges will make your taste buds happy!
## Why Make This Recipe
There are many reasons to make this dish. First, it is simple and quick to prepare. Second, the flavors of garlic and parmesan pair perfectly with sweet potatoes. Finally, these wedges are a healthier alternative to regular fries!
## How to Make Baked Garlic Parmesan Sweet Potato Wedges | Baked garlic parmesan fries, Crispy sweet potato wedges, Easy appetizer recipes
This recipe involves cutting sweet potatoes into wedges, coating them with garlic, parmesan, and a few spices, and then baking them until crispy. You will love how easy it is to create a tasty dish that everyone will enjoy!
## Ingredients
- 3 medium sweet potatoes
- 2 tablespoons olive oil
- 3 cloves garlic, minced
- 1/2 cup grated parmesan cheese
- 1 teaspoon paprika
- 1/2 teaspoon salt
- 1/2 teaspoon black pepper
- 1 teaspoon dried oregano (optional)
## Directions
- Preheat the oven to 425°F (220°C).
- Wash and peel the sweet potatoes.
- Cut them into wedges.
- In a large bowl, mix the olive oil, minced garlic, paprika, salt, pepper, and oregano if using.
- Add the sweet potato wedges to the bowl. Toss well to coat them in the mixture.
- Spread the wedges out on a baking sheet in a single layer.
- Sprinkle the grated parmesan cheese over the top of the wedges.
- Bake for 25-30 minutes, flipping halfway through, until they are golden and crispy.
- Remove from the oven and let cool slightly before serving.
## How to Serve Baked Garlic Parmesan Sweet Potato Wedges | Baked garlic parmesan fries, Crispy sweet potato wedges, Easy appetizer recipes
You can serve these wedges as a tasty snack with dipping sauce like ranch or salsa. They also make a great side dish with grilled meats. Enjoy them at a party as an easy appetizer!
## How to Store Baked Garlic Parmesan Sweet Potato Wedges | Baked garlic parmesan fries, Crispy sweet potato wedges, Easy appetizer recipes
Store any leftover wedges in an airtight container in the refrigerator for up to 3 days. To reheat, place them on a baking sheet and bake at 350°F (175°C) for about 10 minutes until crispy again.
## Tips to Make Baked Garlic Parmesan Sweet Potato Wedges | Baked garlic parmesan fries, Crispy sweet potato wedges, Easy appetizer recipes
- Make sure to cut the sweet potatoes into even sizes for even cooking.
- Don’t overcrowd the baking sheet to ensure the wedges stay crispy.
- Experiment with different herbs and spices to find your favorite flavor.
- If you prefer, leave out the cheese for a dairy-free option.
## Variations
- Add a sprinkle of chili powder for a spicy kick.
- Top with fresh herbs like parsley or cilantro after baking.
## FAQs
- Can I use regular potatoes instead? Yes, you can use regular potatoes if you prefer.
- How do I know when they are done baking? They should be golden brown and crispy on the outside.
- Can I make these wedges ahead of time? Yes! You can prepare them and bake them just before serving for the best texture.
2. Discover Delicious and Easy Recipes to Elevate Your Home Cooking Today

Cooking at home can be fun and rewarding. With the right recipe, you can create a delicious meal that your family will love. Today, I have a simple recipe that is perfect for anyone looking to enjoy great food without spending hours in the kitchen.
## Why Make This Recipe
- It is easy to follow, making it great for beginners.
- It uses common ingredients that you may already have.
- It is quick to prepare, ideal for busy weeknights.
- Your family and friends will love the taste!
## How to Make Discover Delicious and Easy Recipes to Elevate Your Home Cooking Today Making this dish is straightforward. You will gather your ingredients, mix them, and cook them. The result is a tasty meal that can please anyone. Let’s dive deeper into what you need and how to make it. ## Ingredients
- 1 cup of rice
- 2 cups of water
- 1 tablespoon of olive oil
- 1 teaspoon of salt
- 2 cups of vegetables (like broccoli, carrots, or bell peppers)
- 1 teaspoon of garlic powder
- Pepper to taste
## Directions
- Heat the olive oil in a pot over medium heat.
- Add the rice and stir for about 2 minutes.
- Add water, salt, and garlic powder. Bring to a boil.
- Once boiling, reduce the heat and cover the pot. Cook for 15 minutes.
- Add the vegetables to the pot. Stir well.
- Cover the pot again and cook for another 5-7 minutes until the vegetables are tender.
- Fluff the rice with a fork and season with pepper.
## How to Serve Discover Delicious and Easy Recipes to Elevate Your Home Cooking Today You can serve this dish as a main course or as a side. It goes well with grilled chicken or fish. Add a drizzle of soy sauce or your favorite dressing for extra flavor. ## How to Store Discover Delicious and Easy Recipes to Elevate Your Home Cooking Today Store any leftovers in an airtight container in the fridge. It should last for about 3 days. To reheat, use the microwave or warm it on the stove with a bit of water to keep it moist. ## Tips to Make Discover Delicious and Easy Recipes to Elevate Your Home Cooking Today
- Rinse the rice before cooking to remove excess starch.
- Feel free to mix and match vegetables based on your taste.
- Add spices like paprika or cumin for a flavor twist.
- For a creamier texture, stir in some cream or cheese before serving.
## Variations
- Use quinoa instead of rice for a healthier grain option.
- Add cooked chicken or shrimp for added protein.
## FAQs
- Can I use frozen vegetables? Yes, frozen vegetables work great.
- How can I make it spicier? Add some red pepper flakes or hot sauce.
- Can I double the recipe? Absolutely! Just increase your ingredients and cooking time may need little adjustments.
3. Easy Peanut Butter Jelly Snack Bread
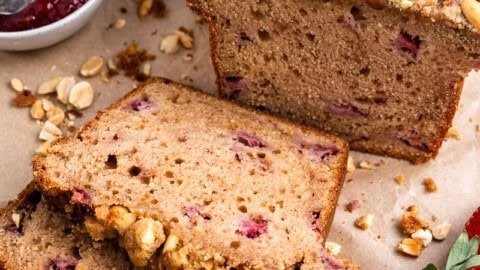
This Peanut Butter Jelly Snack Bread is a fun and tasty treat! It combines the flavors of peanut butter and jelly in a soft, sweet bread. Perfect for breakfast, snacks, or dessert, your family will love this simple recipe.
## Why Make This Recipe
- It’s easy to make and perfect for all skill levels.
- This bread is a delicious blend of flavors that kids and adults will enjoy.
- It’s great for breakfast or a snack any time of day.
- You can customize it with your favorite jams or fruits.
## How to Make Peanut Butter Jelly Snack Bread
Making this bread involves mixing a few simple ingredients and baking them together. You will prepare a sweet batter and swirl in some strawberry jam. Then, you bake it until it’s golden brown and delicious.
## Ingredients
- ¼ cup brown sugar (packed)
- ¼ cup all-purpose flour
- ¼ cup crushed peanuts
- 3 tablespoons butter (melted)
- ¾ cup brown sugar (packed)
- 1 cup milk
- 2 eggs
- ¾ cup creamy peanut butter
- 2 cups all-purpose flour
- ½ teaspoon baking soda
- ½ teaspoon salt
- 1 cup chopped strawberries
- ½ cup strawberry jam
## Directions
Preheat the oven to 350 degrees. Grease a 9×5 inch loaf pan and, if desired, line with a sheet of parchment paper along the bottom and up the two longest sides so you can easily lift the bread from the pan after it’s baked. To make the peanut streusel, mix the brown sugar, flour and peanuts in a small bowl. Add the melted butter and mix until combined and crumbly. Place in the fridge while you prepare the bread.
In a large bowl, whisk together the sugar, milk, eggs and peanut butter until combined. Add the flour, baking soda and salt. Using a rubber spatula to mix together until just combined, then mix in the chopped strawberries. Dollop strawberry jam over the batter in the bowl. Fold the jam into the batter a few times using a rubber spatula, just enough to create swirls.
Pour the batter into the prepared loaf pan and spread into an even layer. If desired, add some extra chopped strawberries to the top. Remove the streusel from the fridge and use your hands or a fork to break it up, then sprinkle over the top of the batter. Bake for 60-75 minutes, or until a toothpick inserted in the center comes out mostly clean or with just a few moist crumbs (not raw batter). I like to loosely cover the bread with parchment paper or aluminum foil halfway through to prevent heavy browning on top. When finished baking, remove from the oven and set on a wire rack to cool for 1 hour in the pan. After this point, you can slice the bread, but it may not slice neatly while still warm. I like to let the bread finish cooling directly on the wire rack before slicing. Enjoy the bread as is or with butter, peanut butter and/or jelly!
## How to Serve Peanut Butter Jelly Snack Bread
- Serve it plain for a simple treat.
- Spread extra peanut butter or jelly on top for added flavor.
- Enjoy with a glass of milk or a cup of coffee.
## How to Store Peanut Butter Jelly Snack Bread
To store the bread, wrap it tightly in plastic wrap or aluminum foil. Keep it at room temperature for 3-4 days. You can also keep it in the fridge for up to a week. To reheat, warm slices in the microwave for about 10-15 seconds.
## Tips to Make Peanut Butter Jelly Snack Bread
- Make sure your butter is melted but not too hot when combining.
- Do not overmix the batter; mixing just until combined helps keep it soft.
- Try using different fruits like blueberries or raspberries instead of strawberries.
- For a nutty flavor, you can add more crushed peanuts on top before baking.
## Variations
- Substitute almond butter for peanut butter for a different taste.
- Use grape jam instead of strawberry for a classic flavor.
- Add chocolate chips for a sweet twist!
## FAQs
- Can I freeze this bread? Yes, you can freeze it for 2-3 months. Wrap it well to prevent freezer burn.
- How do I know when the bread is done? Insert a toothpick into the center; it should come out clean or with a few moist crumbs.
- Can I use other types of flour? Yes, you can try whole wheat flour or almond flour for a different texture.
4. Cranberry Brie Stuffed Chicken Easy

This dish is a perfect blend of flavors that many people love. The creamy brie cheese and sweet cranberry sauce create a fun twist on ordinary chicken. Plus, it looks beautiful when served!
## Why Make This Recipe
Here are a few reasons to try this recipe:
- It is simple and quick to make.
- The flavors are delicious and unique.
- It impresses family and friends.
## How to Make Cranberry Brie Stuffed Chicken
This recipe involves stuffing chicken breasts with brie cheese and cranberry sauce. First, you will season the chicken, then cut pockets for the stuffing. After that, you will sear the chicken and bake it until fully cooked. It’s easy and fun!
## Ingredients
- chicken breasts
- brie cheese
- cranberry sauce
- olive oil
- salt
- pepper
- fresh herbs (optional)
## Directions
- Preheat the oven to 375°F (190°C).
- Season the chicken breasts with salt and pepper.
- Carefully cut a pocket in each chicken breast.
- Stuff the pockets with brie cheese and cranberry sauce.
- Heat olive oil in a skillet over medium heat, and sear the stuffed chicken breasts on both sides until golden brown.
- Transfer the chicken to a baking dish and bake for 20-25 minutes or until the chicken is cooked through.
- Serve warm and enjoy!
## How to Serve Cranberry Brie Stuffed Chicken
You can serve this chicken with a side of rice or a fresh salad. A light sauce can also complement the dish well. Enjoy it with family or friends!
## How to Store Cranberry Brie Stuffed Chicken
Store any leftovers in an airtight container in the fridge. It will stay good for up to 3 days. To reheat, use an oven or microwave until warm.
## Tips to Make Cranberry Brie Stuffed Chicken
- Use a sharp knife to cut the chicken pockets safely.
- Feel free to add extra herbs for more flavor.
- Check that the chicken is fully cooked by cutting into it. The juices should run clear.
## Variations
- Try adding nuts for a crunchy texture.
- Use a different type of cheese if brie is not available.
## FAQs
- Can I use frozen chicken breasts? Yes, just make sure to thaw them completely before cooking.
- What can I serve with this dish? It pairs well with vegetables or mashed potatoes.
- Can I make it ahead of time? Yes, you can prepare the chicken and store it in the fridge before baking.
5. Strawberry Shortcake Rice Krispie Treats: Easy
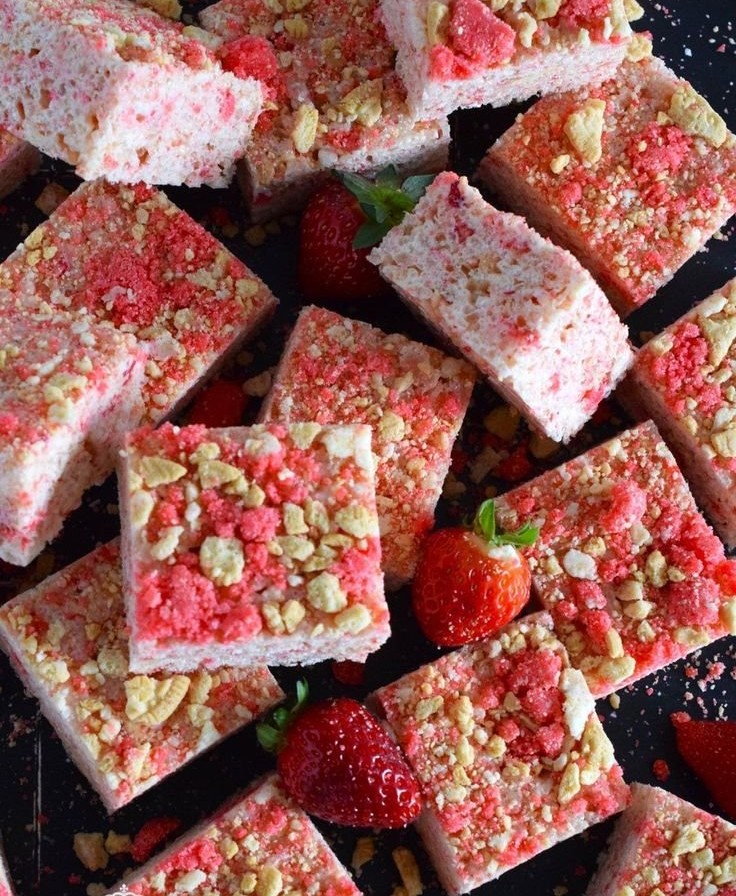
If you love strawberries and treat yourself to something sweet, you will enjoy these Strawberry Shortcake Rice Krispie Treats. They are fun, easy to make, and a perfect snack for any day. Kids and adults alike will love the tasty mix of rice cereal, marshmallows, and fresh strawberries.
## Why Make This Recipe
Here are a few reasons to try this recipe:
- It’s simple and quick to make.
- It combines the classic taste of strawberry shortcake with crispy treats.
- They are perfect for parties, picnics, or just a sweet snack at home.
## How to Make Strawberry Shortcake Rice Krispie Treats
This recipe is easy to follow and requires only a few steps. You will melt butter and marshmallows, mix in Rice Krispies and strawberries, and then press everything into a pan. After some cooling, you can cut them into squares and enjoy!
## Ingredients
- 3 cups Rice Krispies cereal
- 1 cup mini marshmallows or vegan marshmallows
- 3 tablespoons butter or vegan butter
- 1/2 cup strawberries, chopped
- 1/4 cup white chocolate chips (optional)
- 1/2 cup strawberry cookie crumbs
- Pinch of salt
## Directions
- In a large saucepan, melt the butter over low heat.
- Add the marshmallows and stir until completely melted and smooth.
- Remove from heat and gently fold in the chopped strawberries and pinch of salt.
- Stir in the Rice Krispies cereal until well coated.
- If using, fold in the white chocolate chips.
- Press the mixture into a greased 9×9 inch pan, spreading evenly.
- Sprinkle strawberry cookie crumbs on top, pressing them lightly into the mixture.
- Allow to cool, then cut into squares and serve.
## How to Serve Strawberry Shortcake Rice Krispie Treats
You can serve these treats in many ways. Try stacking them on a plate for a pretty look. You can also wrap them in plastic for an easy snack on the go. They taste great with a scoop of ice cream or whipped cream on top!
## How to Store Strawberry Shortcake Rice Krispie Treats
Store the treats in an airtight container at room temperature. They will stay fresh for up to a week. For longer storage, you can keep them in the fridge. If you want to eat them warm, pop them in the microwave for a few seconds.
## Tips to Make Strawberry Shortcake Rice Krispie Treats
- Make sure to stir the marshmallows well to avoid lumps.
- Use fresh strawberries for the best flavor.
- Grease your pan well so the treats come out easily.
- Experiment by adding different toppings like crushed nuts or sprinkles.
## Variations
- Try using mixed berries instead of just strawberries for a fruity twist.
- Add a splash of vanilla extract for extra flavor.
## FAQs
- Can I use gluten-free Rice Krispies? Yes, gluten-free options are available!
- Can I make these treats vegan? Absolutely! Just use vegan butter and marshmallows.
- How do I keep them from getting hard? Store them in an airtight container to keep them soft and chewy.
6. No Bake Classic Woolworth Cheesecake Best
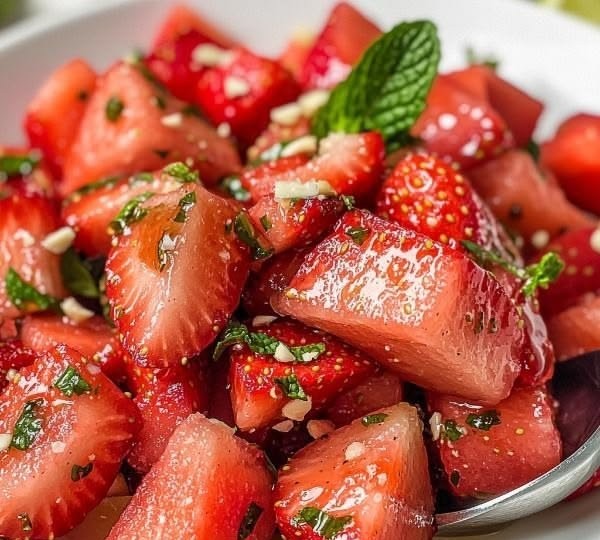
Today, we’re making a creamy and delicious cheesecake that doesn’t need any baking! This No Bake Classic Woolworth Cheesecake is easy to make and perfect for hot days. It’s light, refreshing, and topped with your favorite fruit. Everyone will love it!
## Why Make This Recipe
This recipe is simple and requires no baking, which saves time and hassle. It’s a sweet treat that impresses family and friends without the fuss. You can customize it with your choice of fruit, making it versatile for any occasion. Plus, it’s a great way to enjoy a classic dessert!
## How to Make No Bake Classic Woolworth Cheesecake
Making this cheesecake is quick and easy. You will prepare a crust, then mix cream cheese with sugar and whipped cream. Finally, you pour the filling over the crust and chill it until set. That’s all there is to it!
## Ingredients
- 2 cups graham cracker crumbs
- 1/2 cup unsalted butter, melted
- 1/4 cup sugar
- 2 (8-ounce) packages cream cheese, softened
- 1 cup powdered sugar
- 1 teaspoon vanilla extract
- 1 cup heavy whipping cream
- Fruit topping of your choice (e.g., strawberries, blueberries, or cherries)
## Directions
- In a bowl, combine graham cracker crumbs, melted butter, and sugar until well mixed. Press the mixture into the bottom of a 9-inch springform pan to form the crust. Refrigerate for 10 minutes to set.
- In a separate bowl, beat the cream cheese until smooth. Gradually add the powdered sugar and vanilla, mixing until creamy.
- In another bowl, whip the heavy cream until stiff peaks form. Gently fold the whipped cream into the cream cheese mixture until fully combined.
- Pour the cheesecake filling over the crust in the springform pan, spreading evenly.
- Chill the cheesecake in the refrigerator for at least 4 hours or until set.
- Top with your choice of fruit before serving. Enjoy your delicious cheesecake!
## How to Serve No Bake Classic Woolworth Cheesecake
Serve this cheesecake cold straight from the fridge. You can slice it into pieces and add a dollop of whipped cream on top. For an extra treat, serve it with coffee or tea!
## How to Store No Bake Classic Woolworth Cheesecake
Store leftover cheesecake in the refrigerator. Keep it in the springform pan or place it in an airtight container. It stays fresh for about 3 to 4 days. If you want to freeze it, wrap it well and keep it for up to a month.
## Tips to Make No Bake Classic Woolworth Cheesecake
- Make sure the cream cheese is very soft for easy mixing.
- Whip the cream to stiff peaks to get a light and fluffy filling.
- Chill the cheesecake for more than 4 hours if time allows. It will set better.
- Add a layer of fruit on top before serving for a fresh touch.
## Variations
- Try different fruit toppings like raspberries or peaches.
- Mix in some chocolate chips for a chocolate cheesecake version.
- Add a splash of lemon juice for a tangy flavor.
## FAQs
- Can I use low-fat cream cheese? Yes, but the texture may be a little different.
- How do I know when the cheesecake is set? It should be firm to the touch and not jiggly.
- Can I make this cheesecake ahead of time? Yes! It’s great to make a day before serving.
7. Best Summer Berry Cream Cheese Muffins
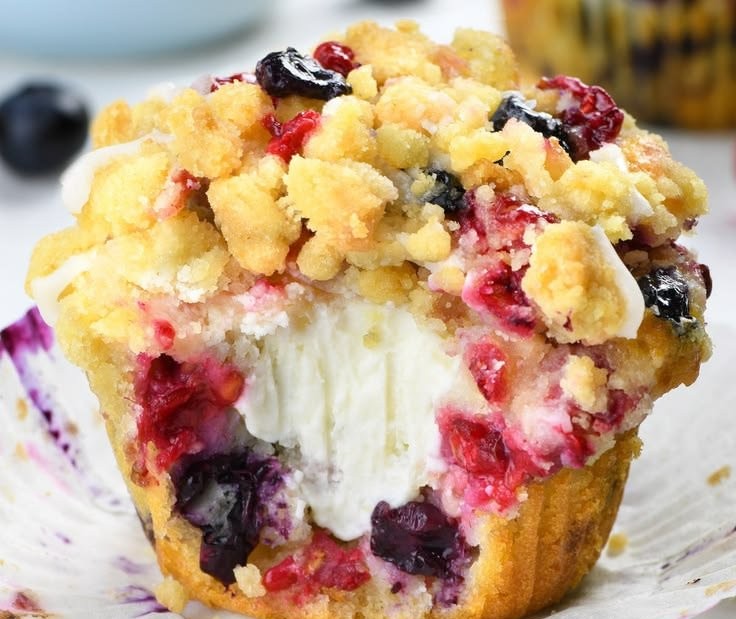
Summer Berry Cream Cheese Muffins are a tasty treat that brings the joy of fresh berries in every bite. They are soft, sweet, and very easy to make. Perfect for breakfast or a snack, these muffins will make your day brighter!
## Why Make This Recipe
Here are a few reasons to love these muffins:
- They are packed with delicious berries.
- The cream cheese filling gives a rich flavor.
- Perfect for breakfast, brunch, or dessert.
- Easy to make and great to share!
## How to Make Summer Berry Cream Cheese Muffins
This recipe is simple and fun. You mix the dry and wet ingredients separately, then combine them. After that, fill the muffin liners, add a sweet cream cheese dollop, and top with a buttery crumble. Bake until golden and drizzle with glaze!
## Ingredients
- 1 cup all-purpose flour
- 1 cup whole wheat flour
- 1/2 cup sugar
- 1 tablespoon baking powder
- 1/2 teaspoon salt
- 1/2 cup milk
- 1/2 cup vegetable oil
- 1 large egg
- 1 teaspoon vanilla extract
- 1 cup mixed berries (blueberries and raspberries)
- 4 ounces cream cheese, softened
- 1/4 cup powdered sugar
- 1/2 cup butter crumble topping (butter, flour, sugar)
- 1/2 cup vanilla glaze (powdered sugar, milk, vanilla extract)
## Directions
- Preheat oven to 375°F (190°C) and line a muffin tin with paper liners.
- In a bowl, whisk together the all-purpose flour, whole wheat flour, sugar, baking powder, and salt.
- In another bowl, combine the milk, vegetable oil, egg, and vanilla extract. Mix until well combined.
- Gradually add the wet ingredients to the dry ingredients and stir until just combined. Gently fold in the mixed berries.
- In a separate bowl, beat the cream cheese and powdered sugar together until smooth.
- Fill each muffin liner halfway with the batter, add a dollop of the cream cheese mixture, then top with more batter until the liners are about 2/3 full.
- Sprinkle the buttery crumble topping over each muffin.
- Bake for 18-20 minutes or until a toothpick inserted comes out clean.
- For the glaze, whisk the powdered sugar with milk and vanilla extract until smooth.
- Allow muffins to cool slightly before drizzling with glaze. Serve warm.
## How to Serve Summer Berry Cream Cheese Muffins
Enjoy these muffins warm with a cup of tea or coffee. They are also great for breakfast on the go. You can serve them with fresh fruit for a nice touch!
## How to Store Summer Berry Cream Cheese Muffins
Store the muffins in an airtight container at room temperature for up to 3 days. For longer storage, keep them in the fridge for up to a week. You can also freeze them for up to 3 months. Reheat in the microwave for a warm treat!
## Tips to Make Summer Berry Cream Cheese Muffins
- Use fresh or frozen berries for great flavor.
- Ensure the cream cheese is softened for easy mixing.
- Don’t overmix the batter, or the muffins may be tough.
- Add nuts or chocolate chips for extra flavor.
## Variations
- Try different berries like strawberries or blackberries.
- For a nutty flavor, add chopped walnuts or almonds.
- Use lemon zest in the batter for a fresh twist.
## FAQs
- Can I use low-fat cream cheese?
- Yes, you can use low-fat cream cheese if you prefer.
- How can I make these muffins gluten-free?
- Use gluten-free flour instead of all-purpose and whole wheat flour.
- What if I don’t have mixed berries?
- You can use just one type of berry or any fresh fruit you like.
8. Strawberry Upside Down Cake: Easy
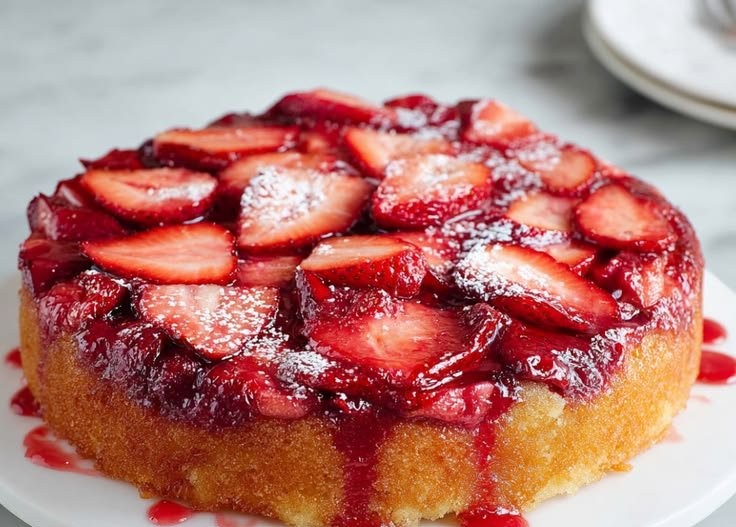
Strawberry upside down cake is a sweet treat that everyone loves. It has a soft cake and delicious strawberries on top. This cake is easy to make and perfect for any occasion.
Why Make This Recipe
- It’s simple and quick to prepare.
- Everyone loves strawberries and cake!
- It looks beautiful when served.
- You can enjoy it warm or cold.
How to Make Strawberry Upside Down Cake
Making strawberry upside down cake involves melting butter and brown sugar, arranging strawberries, and mixing cake batter. The cake bakes in the oven until it’s golden and delicious.
Ingredients
- 2 cups fresh strawberries, halved
- 1/2 cup unsalted butter
- 1 cup brown sugar
- 1 1/2 cups all-purpose flour
- 1 cup granulated sugar
- 1/2 cup milk
- 2 large eggs
- 1 teaspoon vanilla extract
- 2 teaspoons baking powder
- 1/2 teaspoon salt
Directions
- Preheat your oven to 350°F (175°C). Grease a 9-inch round cake pan.
- Melt the butter in a saucepan over medium heat, then stir in the brown sugar until dissolved. Pour this mixture into the prepared cake pan.
- Arrange the halved strawberries on the brown sugar mixture, cut side up.
- In a mixing bowl, cream the granulated sugar and remaining butter until fluffy.
- Beat in the eggs one at a time, then stir in the vanilla.
- Combine the flour, baking powder, and salt in another bowl. Gradually add to the creamed mixture alternately with the milk, beginning and ending with the flour mixture.
- Pour the batter over the strawberries in the pan.
- Bake for 35-40 minutes or until a toothpick inserted into the center comes out clean.
- Allow to cool for 10 minutes, then invert onto a serving plate.
- Serve warm with whipped cream or ice cream.
How to Serve Strawberry Upside Down Cake
Serve this cake warm with a scoop of ice cream or a dollop of whipped cream. It can also be enjoyed with a cup of tea or coffee.
How to Store Strawberry Upside Down Cake
Store any leftover cake in an airtight container in the fridge. It will stay fresh for about three days. To reheat, warm it in the microwave for a few seconds.
Tips to Make Strawberry Upside Down Cake
- Use fresh, ripe strawberries for the best flavor.
- Make sure your butter is at room temperature for easier mixing.
- Do not skip the cooling step before inverting the cake.
- Try adding a pinch of cinnamon for extra flavor in the cake batter.
Variations
- Use blueberries or peaches instead of strawberries for a different fruit taste.
- Add nuts like pecans or walnuts for a crunchy texture.
- Mix in some lemon zest for a citrus twist.
FAQs
- Can I use frozen strawberries? Yes, but make sure to thaw and drain them first.
- How do I know when the cake is done? Insert a toothpick in the center; if it comes out clean, it’s ready.
- Can I make this cake ahead of time? Yes, you can bake it a day in advance and store it in the fridge.
9. Cheese Tortellini Pasta Salad: Easy

This cheese tortellini pasta salad is a simple, tasty dish that everyone will love. It is perfect for lunches, picnics, or potlucks. With fresh veggies and cheese, it is a colorful and healthy choice.
## Why Make This Recipe
Here are a few reasons to love this recipe:
- It’s quick and easy to make.
- It is full of flavor and colors.
- You can make it ahead of time.
- Everyone can enjoy it, from kids to adults.
## How to Make Cheese Tortellini Pasta Salad
This pasta salad comes together quickly. You will cook the tortellini and mix it with fresh veggies and Italian dressing. It is very easy to prepare.
## Ingredients
- Cheese tortellini
- Italian dressing
- Cherry tomatoes
- Cucumber
- Bell pepper
- Red onion
- Olives
- Parmesan cheese
- Salt
- Pepper
## Directions
- Cook the cheese tortellini according to the package instructions. Drain and let cool.
- In a large bowl, combine the cooled tortellini, cherry tomatoes, cucumber, bell pepper, red onion, and olives.
- Drizzle with Italian dressing and toss to coat.
- Season with salt and pepper to taste.
- Sprinkle with Parmesan cheese before serving. Enjoy!
## How to Serve Cheese Tortellini Pasta Salad
This pasta salad is great as a side dish or a light meal. Serve it cold on a hot day or warm it up in the microwave if you prefer. It also pairs well with grilled chicken or fish.
## How to Store Cheese Tortellini Pasta Salad
Keep leftover pasta salad in an airtight container in the fridge. It should last for about 3 days. If you want to reheat it, warm it gently in the microwave.
## Tips to Make Cheese Tortellini Pasta Salad
- Make sure to cool the tortellini before mixing it with vegetables.
- Toss the salad with dressing just before serving to keep it fresh.
- Chop the veggies into small pieces for easy eating.
- Feel free to add more veggies like carrots or spinach.
## Variations
- Add grilled chicken for extra protein.
- Swap Italian dressing for a vinaigrette.
- Use different types of cheese like feta or mozzarella.
## FAQs
Can I use any pasta instead of tortellini?
Yes, you can use any type of pasta you like.
Can I make this salad ahead of time?
Yes, it tastes great when made a few hours or the day before.
Is this salad gluten-free?
Use gluten-free tortellini to make it gluten-free.
10. Best Roasted Corn Ribs

Roasted corn ribs are a fun and tasty treat. They are easy to make and perfect for any meal. These corn ribs are crispy and full of flavor. Your family and friends will love them!
## Why Make This Recipe
Here are a few reasons to make roasted corn ribs:
- They are simple to prepare.
- They taste amazing with spices.
- They make a great snack or side dish.
## How to Make Roasted Corn Ribs
Making roasted corn ribs is quick and fun! You will prepare the corn by cutting it, mixing it with oil and spices, and then baking it. In just a little time, you will have tasty corn ribs ready to eat.
## Ingredients
- 4 corn cobs
- 2 tablespoons olive oil
- 1 teaspoon garlic powder
- 1/2 teaspoon onion powder
- 1/2 teaspoon chili powder
- 1/2 teaspoon smoked paprika
- 1/2 teaspoon salt
- 1/2 teaspoon pepper
## Directions
- Preheat oven to 400°F.
- Prep the corn – snap cobs in half, then slice lengthwise through cob. Slice again into quarters.
- In a ziplock bag, or large bowl, mix corn, olive oil, and spices until evenly coated.
- Place corn in a single layer on baking sheet and bake for 25-35 minutes, or until desired browning.
## How to Serve Roasted Corn Ribs
Serve roasted corn ribs as a snack or side dish. You can also add a sprinkle of cheese on top for extra flavor. Another idea is to dip them in your favorite sauce.
## How to Store Roasted Corn Ribs
To store roasted corn ribs, place them in an airtight container. They will stay fresh in the fridge for up to three days. To reheat, simply place them in the oven again until warm.
## Tips to Make Roasted Corn Ribs
- Use fresh corn for the best flavor.
- Try different spices to create your own mix.
- Don’t overcrowd the baking sheet. Space helps them get crispy.
## Variations
- Add Parmesan cheese before baking for a cheesy taste.
- Sprinkle with lime juice after baking for a fresh zing.
## FAQs
- Can I use frozen corn? It’s better to use fresh corn for the best texture.
- How can I make it spicier? Add more chili powder or a bit of cayenne pepper.
- Can I grill corn ribs instead? Yes! Grilling is a great option for a smoky flavor.
11. Air Fryer Banana Peppers Easy Recipe

Air Fryer Banana Peppers
If you’re looking for a tasty and easy dish, you’ve come to the right place! Air Fryer Banana Peppers are a fun and delicious way to enjoy this colorful vegetable. They are simple to make and perfect for any meal or snack.
Why Make This Recipe
- It is quick and easy to prepare.
- The air fryer makes the peppers crispy and tender.
- You can customize the filling to your taste.
- They taste great as a snack or side dish.
How to Make Air Fryer Banana Peppers
Making Air Fryer Banana Peppers is a simple process. You will prepare the banana peppers by slicing them and removing the seeds. Then, drizzle them with olive oil and season with salt and pepper. If you like, you can fill them with cheese or meat before air frying.
Ingredients
- Banana peppers
- Olive oil
- Salt
- Pepper
- Cheese (optional)
- Ground meat or meat alternative (optional)
Directions
- Preheat the air fryer to 375°F (190°C).
- Slice the banana peppers in half lengthwise and remove the seeds.
- Drizzle olive oil over the peppers and season with salt and pepper.
- If using, fill the peppers with cheese and/or ground meat.
- Place the stuffed peppers in the air fryer basket in a single layer.
- Cook for 10-12 minutes, or until the peppers are tender and the filling is cooked through.
- Serve warm.
How to Serve Air Fryer Banana Peppers
- Serve them as a snack with dips like ranch or salsa.
- Add them to your favorite salad for a spicy kick.
- Pair them with grilled meats for a colorful plate.
How to Store Air Fryer Banana Peppers
Store any leftovers in an airtight container in the fridge. They will last for up to 3 days. To reheat, simply pop them back in the air fryer for a few minutes until warm.
Tips to Make Air Fryer Banana Peppers
- Make sure to remove all the seeds for less heat.
- Try different types of cheese for fun flavors.
- Do not overcrowd the air fryer basket for even cooking.
- Adjust the cooking time based on your air fryer model.
Variations
- Add cooked rice or quinoa to the filling for extra texture.
- Use spicy sausage for a bolder taste.
- Top with fresh herbs like parsley or cilantro before serving.
FAQs
- Can I use other types of peppers? Yes, you can use any mild peppers you like!
- Are these gluten-free? Yes, just use gluten-free fillings.
- Can I make them vegan? Absolutely! Use a meat alternative and dairy-free cheese.
12. Steak Queso Rice

This steak queso rice is a delicious and hearty dish. It’s perfect for a quick dinner or a fun gathering. You will love the mix of flavors from the steak and cheese!
## Why Make This Recipe
Here are a few reasons to try this recipe:
- It’s quick and easy to make.
- The cheesy flavor makes it super tasty!
- You can customize it to your liking.
## How to Make Steak Queso Rice
This dish comes together in just a few steps. First, you’ll cook the steak, then mix in the queso and rice. Finally, you serve it all together for a warm, comforting meal.
## Ingredients
- 1 lb steak (sirloin or flank)
- 1 cup homemade queso sauce
- 2 cups cooked rice
- 1 tablespoon olive oil
- 1 teaspoon taco seasoning
- Salt and pepper to taste
- Chopped cilantro (for garnish)
- Lime wedges (for serving)
## Directions
- Heat olive oil in a skillet over medium-high heat. Season steak with salt, pepper, and taco seasoning. Sear the steak for 4-5 minutes on each side until cooked to desired doneness.
- Remove the steak from the skillet, allow it to rest for a few minutes, then slice it thinly.
- In the same skillet, add the cooked rice and queso sauce, stirring to combine and heat through.
- Serve the seasoned rice topped with sliced steak and garnish with chopped cilantro.
- Serve with lime wedges on the side.
## How to Serve Steak Queso Rice
You can serve it as a main dish or as a side. Try pairing it with some tortilla chips for a crunchy bite. Adding a fresh salad on the side is also a great idea!
## How to Store Steak Queso Rice
Leftovers can be stored in an airtight container in the fridge. They will last for 3-4 days. To reheat, just warm it in the microwave until hot.
## Tips to Make Steak Queso Rice
- Make sure to let the steak rest before slicing to keep it juicy.
- Feel free to add more veggies, like bell peppers or onions, to the rice.
- Adjust the spice level by adding more or less taco seasoning.
## Variations
- Swap steak for chicken or shrimp for a different protein.
- Use store-bought queso to save time.
- Add black beans or corn for extra flavor and texture.
## FAQs
- Can I use leftover steak? Yes, leftover steak works great in this recipe!
- What type of rice should I use? You can use white rice, brown rice, or any rice you like.
- Can I freeze the dish? It’s best to eat it fresh, but you can freeze it for a month. Just reheat thoroughly before serving.
13. Christmas Butter Toffee Pretzels Easy

Why Make This Recipe
These Christmas Butter Toffee Pretzels are a fun treat for the holiday season. They are sweet, salty, and crunchy all at once. This recipe is easy to follow and only takes a little time. You can share them with friends or enjoy them yourself!
How to Make Christmas Butter Toffee Pretzels
Making these treats is simple! You will melt butter and brown sugar to create a toffee. Then, you will pour it over pretzels and bake them. Finally, you add chocolate and nuts for extra flavor!
Ingredients
- 2 cups pretzels
- 1 cup unsalted butter
- 1 cup light brown sugar
- 1 cup chocolate chips
- 1 cup crushed nuts (optional)
- 1 teaspoon vanilla extract
- Sea salt for sprinkling
Directions
- Preheat your oven to 350°F (175°C).
- Spread pretzels on a baking sheet lined with parchment paper.
- In a saucepan, melt butter and brown sugar over medium heat, stirring constantly until combined and smooth.
- Remove from heat and stir in vanilla extract.
- Pour the butter toffee mixture over the pretzels, making sure to coat them evenly.
- Bake in the preheated oven for 10-12 minutes, stirring halfway through.
- Remove from oven and immediately sprinkle with chocolate chips. Allow the chocolate to melt and then spread it evenly.
- Optionally, sprinkle crushed nuts and sea salt on top.
- Let cool completely before breaking into pieces.
How to Serve Christmas Butter Toffee Pretzels
These pretzels are perfect for holiday parties. You can put them in a bowl and let everyone grab some. They also make great gifts when packaged in cute bags or jars!
How to Store Christmas Butter Toffee Pretzels
Store your pretzels in an airtight container. They will stay fresh at room temperature for about a week. If you want to keep them longer, you can freeze them. Just make sure they are in a well-sealed bag!
Tips to Make Christmas Butter Toffee Pretzels
- Try to coat the pretzels evenly with the toffee for the best taste.
- Stir the pretzels halfway through baking for even baking.
- Use high-quality chocolate chips for a richer flavor.
- Adjust the amount of nuts based on your preference.
Variations
- Use white chocolate instead of regular chocolate chips for a different taste.
- Add a sprinkle of cinnamon to the toffee for a warm flavor.
- For crunch, try adding crushed pretzels on top.
FAQs
- Can I use salted butter? Yes, but it may make the treat a bit saltier.
- What kind of nuts can I use? Almonds, pecans, or walnuts all work well.
- Can I make these in advance? Yes! They store well for about a week.
14. Lemon Blueberry Cheesecake Cookies: Easy
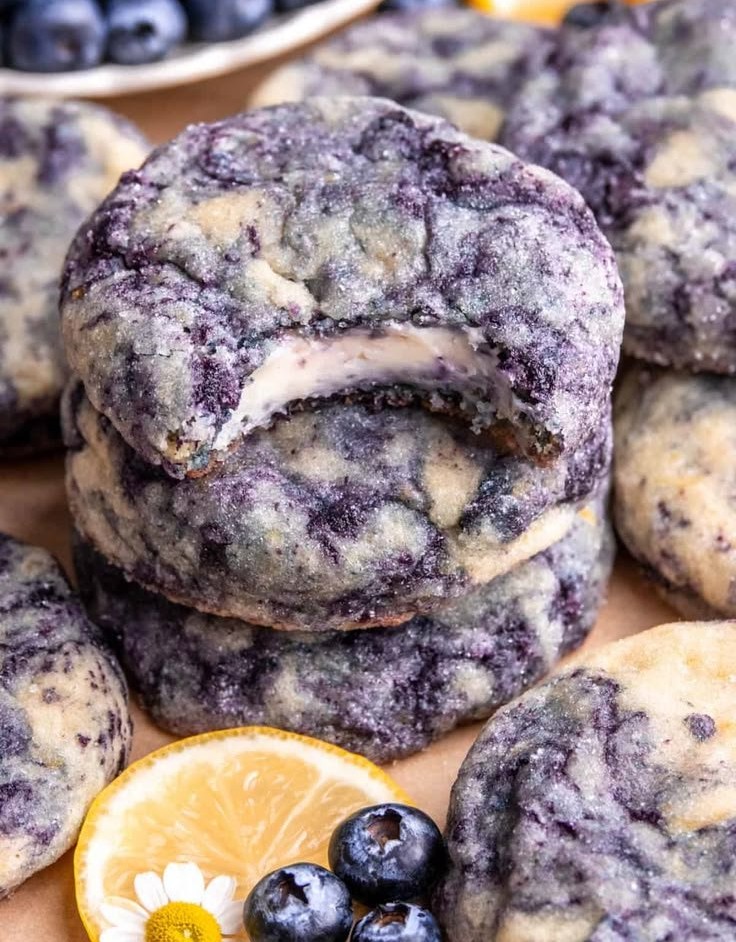
These cookies are a delightful treat! With the sweet taste of blueberries and the zesty hint of lemon, they bring joy to every bite. Perfect for any occasion, they are easy to make and oh-so-tasty!
## Why Make This Recipe
Here are a few reasons why you’ll love these cookies:
- They are soft and chewy, perfect for satisfying your sweet tooth.
- The mix of lemon and blueberry makes them fresh and flavorful.
- They are simple to bake and great for sharing with friends and family.
## How to Make Lemon Blueberry Cheesecake Cookies
This recipe involves mixing creamy ingredients with dry ingredients, then adding fresh blueberries. It’s a quick and fun process that gives you delicious cookies in no time!
## Ingredients
- 1 cup granulated sugar
- 1/2 cup unsalted butter, softened
- 1 cream cheese (8oz), softened
- 1 large egg
- 1 teaspoon vanilla extract
- 2 tablespoons lemon juice
- 1 tablespoon lemon zest
- 2 cups all-purpose flour
- 1 teaspoon baking powder
- 1/2 teaspoon salt
- 1 cup fresh blueberries
## Directions
- Preheat the oven to 350°F (175°C) and line a baking sheet with parchment paper.
- In a large bowl, beat the sugar and butter together until creamy.
- Add the cream cheese, egg, vanilla extract, lemon juice, and lemon zest; mix until smooth.
- In another bowl, whisk together the flour, baking powder, and salt.
- Gradually add the dry ingredients to the wet ingredients, mixing just until combined.
- Gently fold in the blueberries.
- Drop tablespoon-sized balls of dough onto the prepared baking sheet.
- Bake for 10-12 minutes or until the edges are lightly golden.
- Allow to cool before serving.
## How to Serve Lemon Blueberry Cheesecake Cookies
Enjoy these cookies as a sweet snack or dessert. Pair them with a glass of milk or a cup of tea for a lovely treat. They are also great for parties and gatherings!
## How to Store Lemon Blueberry Cheesecake Cookies
Store the cookies in an airtight container at room temperature. They will stay fresh for about a week. You can also freeze them for longer storage. Just thaw them before eating.
## Tips to Make Lemon Blueberry Cheesecake Cookies
- Make sure your butter and cream cheese are soft for easy mixing.
- Use fresh blueberries for the best flavor.
- Do not overmix the dough once you add the flour.
- For extra lemon flavor, add more lemon zest if you like.
## Variations
- Try using raspberries instead of blueberries for a different taste.
- Add white chocolate chips for a sweet twist.
## FAQs
- Can I use frozen blueberries? Yes, frozen blueberries work well. Just don’t thaw them before adding.
- How do I know when the cookies are done? The edges should be lightly golden brown.
- Can I make the dough ahead of time? Yes, you can refrigerate the dough for up to 2 days before baking.
15. Ice Cream Sandwich Cake
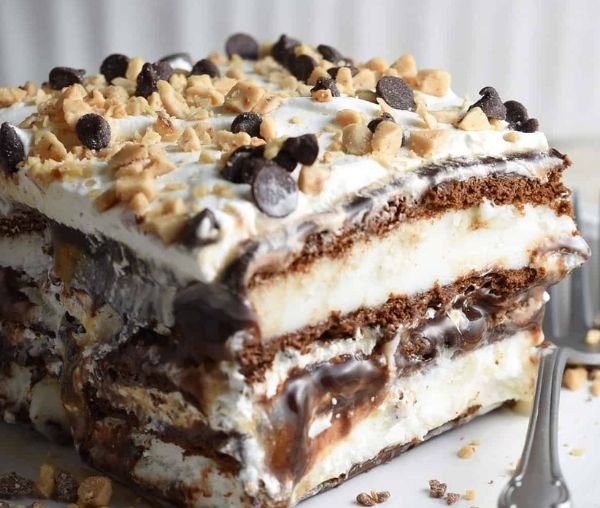
This Ice Cream Sandwich Cake is a fun and easy dessert. It combines ice cream sandwiches, whipped topping, and your favorite ice cream. It’s perfect for hot days or parties. Everyone will love it!
## Why Make This Recipe
This recipe is great for many reasons:
- It’s super simple to make, even for kids.
- You can use any flavor of ice cream you like.
- It’s a crowd-pleaser at family gatherings and parties.
- You can customize it with your favorite toppings.
## How to Make Ice Cream Sandwich Cake
Making this cake involves layering ice cream sandwiches, whipped topping, and your choice of ice cream. You then freeze it until firm. Finally, top it off with cherries and any extra decorations before you serve.
## Ingredients
- 12-16 ice cream sandwiches
- 1 container of whipped topping (like Cool Whip)
- 2 cups of your favorite ice cream (softened)
- Chocolate sauce
- Caramel sauce
- Chopped nuts or sprinkles (optional)
- Maraschino cherries for topping (optional)
## Directions
- Line a 9×13 inch baking dish with parchment paper.
- Place a layer of ice cream sandwiches at the bottom of the dish.
- Spread half of the softened ice cream over the sandwiches, followed by a layer of whipped topping.
- Drizzle with chocolate and caramel sauce, then sprinkle with nuts or sprinkles if desired.
- Repeat the layers with the remaining ingredients, ending with whipped topping on the top.
- Cover and freeze for at least 4 hours or until firm.
- Before serving, decorate with cherries on top and additional toppings if wished.
## How to Serve Ice Cream Sandwich Cake
Serve this cake right from the freezer. Slice it into squares for easy serving. You can add extra chocolate or caramel sauce on top if you like.
## How to Store Ice Cream Sandwich Cake
This cake can be stored in the freezer. Make sure to cover it well with plastic wrap or a lid. It will keep for about a week.
## Tips to Make Ice Cream Sandwich Cake
- Let the ice cream sit out for a few minutes before spreading it to make it easier to work with.
- Use parchment paper for easy cleanup and to lift the cake out later.
- Try different ice cream flavors for unique tastes.
- Freeze it overnight for the best results.
## Variations
- Use cookie sandwiches instead of traditional ice cream sandwiches.
- Add a layer of fruit, like strawberries or bananas, between the layers.
- Mix in crushed cookies or candy bars for added crunch.
## FAQs
- Can I use sugar-free ice cream? Yes, you can use any type of ice cream.
- How long does it take to freeze? It takes at least 4 hours to freeze firm.
- Can I make it ahead of time? Yes, you can make it a day before you plan to serve.
16. Gluten Free Chocolate Babka Easy
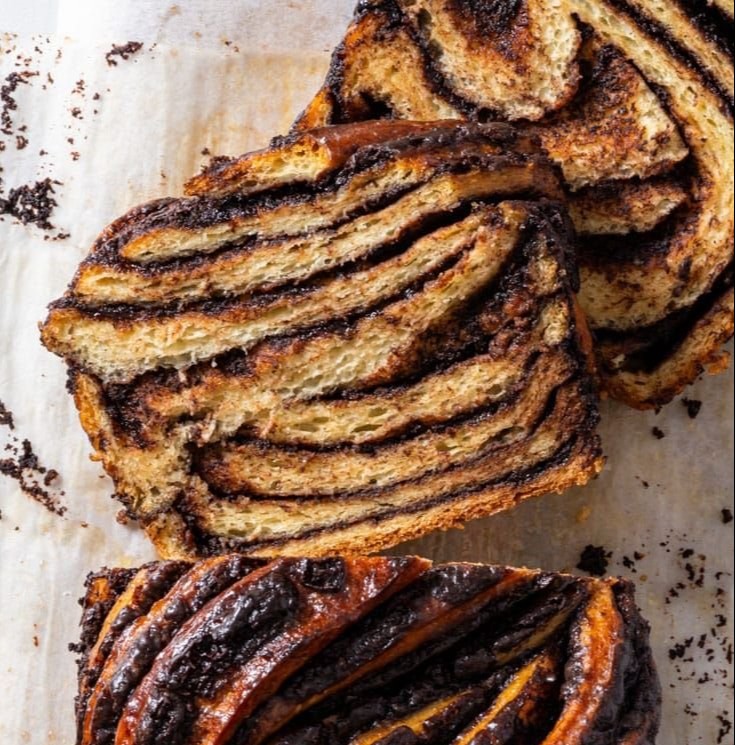
If you love chocolate and baked goods, this gluten-free chocolate babka is for you. This sweet, rich bread is a real treat. It has layers of chocolate and cocoa that will melt in your mouth.
## Why Make This Recipe
- This babka is easy to make, even for beginners.
- It is gluten-free, so everyone can enjoy it.
- It’s perfect for breakfast, dessert, or a snack.
- The chocolate flavor is rich and satisfying.
## How to Make Gluten Free Chocolate Babka Making gluten-free chocolate babka involves mixing a few simple ingredients together. First, you’ll prepare the dough and let it rise. Then, you’ll spread chocolate on the dough, roll it up, and bake it until golden. It’s a fun and tasty process! ## Ingredients
- 2 cups gluten-free all-purpose flour
- 1/4 cup sugar
- 1 teaspoon baking powder
- 1/2 teaspoon salt
- 1/2 cup milk (or non-dairy milk)
- 1/4 cup butter (or dairy-free alternative), melted
- 1 large egg
- 1 teaspoon vanilla extract
- 1/2 cup chocolate chips (or chopped chocolate)
- 1/4 cup cocoa powder
## Directions
- Preheat the oven to 350°F (175°C). Grease a loaf pan.
- In a bowl, mix gluten-free flour, sugar, baking powder, and salt.
- In another bowl, combine milk, melted butter, egg, and vanilla.
- Gradually stir the wet ingredients into the dry ingredients until a dough forms.
- Roll the dough out on a floured surface into a rectangle.
- Spread melted chocolate or chocolate chips evenly over the dough.
- Sprinkle cocoa powder on top.
- Roll the dough tightly and shape it into a twisted loaf.
- Place in a prepared loaf pan and let it rise for about 30 minutes.
- Bake for 25-30 minutes until golden and a toothpick comes out clean.
- Allow to cool before slicing and serving.
## How to Serve Gluten Free Chocolate Babka You can enjoy this babka warm or at room temperature. It pairs well with coffee or tea. You may also add a dusting of powdered sugar on top for extra sweetness. ## How to Store Gluten Free Chocolate Babka To store, keep the babka in an airtight container at room temperature. It will stay fresh for a few days. For longer storage, wrap it tightly and freeze it. You can reheat slices in the oven or microwave. ## Tips to Make Gluten Free Chocolate Babka
- Make sure to use gluten-free flour that has a good blend of ingredients.
- Let the dough rise in a warm place for best results.
- Use high-quality chocolate for great flavor.
- For a richer taste, add some chocolate chips to the dough itself.
## Variations
- Try adding nuts, like walnuts or almonds, for a crunch.
- Add cinnamon to the chocolate mixture for a different flavor.
## FAQs
- Can I use different kinds of milk? Yes, any milk or non-dairy milk works.
- Is there a dairy-free option? Yes, use dairy-free butter and milk.
- How can I tell when the babka is done? It should be golden brown and a toothpick should come out clean.
17. Easy Goat Cheese Stuffed Mini Peppers

Goat cheese stuffed mini peppers are a delightful and simple appetizer. They are colorful, tasty, and easy to make. Perfect for parties or just a snack at home!
## Why Make This Recipe
- These mini peppers are bright and fun to eat.
- Stuffing them with goat cheese makes them creamy and delicious.
- They are quick to prepare and cook.
- Drizzling with balsamic glaze and honey adds extra flavor.
## How to Make Goat Cheese Stuffed Mini Peppers (Easy Appetizer!) Making goat cheese stuffed mini peppers is easy. You will wash and cut the peppers, fill them with goat cheese, and roast them in the oven. After baking, drizzle with balsamic glaze and honey, then sprinkle with thyme and black pepper. ## Ingredients
- 1 pound mini sweet bell peppers (12 peppers)
- 10 ounce goat cheese
- Balsamic glaze, to drizzle
- Honey, to drizzle
- 2 Tbsp fresh thyme (or dried, but fresh is prettier!)
- Black pepper, to taste
## Directions
- Preheat oven to 400F.
- Wash and dry mini peppers. Cut each pepper in half lengthwise. Remove the seeds and any fleshy white bits.
- Spread a couple scoops of goat cheese into each pepper half. NOTE: Feel free to use as much or as little goat cheese as you want – they can be stuffed to the brim, or filled with just a small scoop of cheese. This recipe is just a guide 🙂
- When all the peppers are filled, spread them in a baking dish or sheet in a single layer.
- Pop them in a preheated oven for 20-25 minutes, or until the peppers are lightly browned/charred and soft.
- Remove the roasted mini peppers from the oven and transfer to a serving platter. Drizzle them with balsamic glaze and honey, then finish with a sprinkle of fresh thyme and freshly ground black pepper. Serve warm + enjoy!
## How to Serve Goat Cheese Stuffed Mini Peppers (Easy Appetizer!)
- Serve as a starter before a meal.
- Offer them at your next party or gathering.
- Pair with a refreshing drink.
## How to Store Goat Cheese Stuffed Mini Peppers (Easy Appetizer!) Store any leftovers in an airtight container in the fridge. They will last for about 3 days. To reheat, place them in the oven at a low temperature until warm. ## Tips to Make Goat Cheese Stuffed Mini Peppers (Easy Appetizer!)
- Choose peppers that are firm and bright in color.
- Experiment with different herbs for added flavor.
- For a spicy kick, add a bit of red pepper flakes.
- Try different types of cheese if you want a change.
## Variations
- Use cream cheese for a different taste.
- Add chopped sun-dried tomatoes to the goat cheese.
- Top with chopped olives for extra flavor.
## FAQs
- Can I make these ahead of time? Yes, you can prepare them a few hours ahead. Just bake them right before serving.
- What can I use instead of goat cheese? Cream cheese or feta cheese work well too.
- Are these spicy? No, they are mild and sweet.
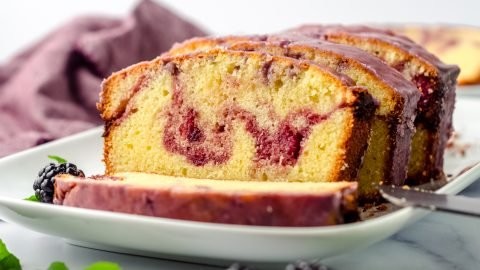
18. Blackberry Pound Cake: Easy Recipe
Why Make This Recipe
Blackberry pound cake is a delightful treat. It is moist, sweet, and full of berry flavor. You can enjoy it for breakfast, as a snack, or for dessert. Plus, it looks beautiful and is great for sharing with friends and family.
How to Make Blackberry Pound Cake Recipe
This recipe involves making a delicious blackberry swirl and a rich pound cake. You mix the ingredients, bake the cake, and then finish it with a tasty blackberry icing. The combination of flavors and textures makes it special.
Ingredients
- 4 ounces (113g) fresh blackberries (about 1 cup)
- 3 Tablespoons (38g) granulated sugar
- 1 Tablespoon (15mL) lemon juice
- 2 cups minus 2 Tablespoons (225g) cake flour1
- ½ teaspoon salt
- 1 cup (227g) unsalted butter (softened to room temperature2)
- 1 and ½ cups (300g) granulated sugar
- 1 teaspoon vanilla extract
- 4 large eggs (at room temperature2)
- ¼ cup (60g) sour cream (at room temperature2)
- 2 ounces (57g) fresh blackberries (about ½ cup)
- 1 cup (120g) powdered sugar
- 1 Tablespoon (15mL) milk
- ½ teaspoon vanilla extract
- ⅛ teaspoon salt
Directions
BLACKBERRY SWIRL: In a bowl, mix 4 ounces fresh blackberries, 3 tablespoons granulated sugar, and 1 tablespoon lemon juice. Mash the blackberries a bit and set aside.
POUND CAKE: Preheat your oven. In one bowl, whisk together 2 cups minus 2 tablespoons cake flour and ½ teaspoon salt. In another bowl, beat 1 cup softened butter and 1 and ½ cups granulated sugar until light and fluffy. Add 1 teaspoon vanilla extract and 4 large eggs, one at a time. Mix well. Add in the flour mixture and ¼ cup sour cream. Fold in 2 ounces fresh blackberries. Pour half of the batter into a prepared pan. Add the blackberry swirl on top, then pour in the rest of the batter. Swirl gently with a knife. Bake until golden brown.
BLACKBERRY ICING: Mix 1 cup powdered sugar, 1 tablespoon milk, ½ teaspoon vanilla extract, and ⅛ teaspoon salt until smooth. If it is too thick, add a little more milk. Drizzle the icing over the cooled cake.
How to Serve Blackberry Pound Cake Recipe
Serve this cake with a cup of tea or coffee. You can also enjoy it with a scoop of vanilla ice cream. For a special touch, garnish with fresh blackberries on the side.
How to Store Blackberry Pound Cake Recipe
Keep the cake in an airtight container at room temperature for up to three days. You can also refrigerate it for up to a week. To reheat, just warm a slice in the microwave for a few seconds.
Tips to Make Blackberry Pound Cake Recipe
- Use ripe blackberries for the best flavor.
- Make sure the butter and eggs are at room temperature for a smoother batter.
- Do not overmix the batter to keep the cake light and fluffy.
- Check if the cake is done by inserting a toothpick in the center. It should come out clean.
Variations
- Try using raspberries or blueberries instead of blackberries.
- Add lemon zest for a bright citrus flavor.
- Mix in some chopped nuts for extra crunch.
FAQs
- Can I use frozen blackberries? Yes, you can use frozen blackberries. Just thaw and drain them first.
- Is there a way to make this cake healthier? You can try using a sugar substitute or whole wheat flour for part of the cake flour.
- Can I freeze the pound cake? Yes, you can freeze the cake before icing it. Wrap it tightly in plastic wrap and store it in the freezer for up to three months.
19. Quick Tropical Green Smoothie Bowl
Why Make This Recipe
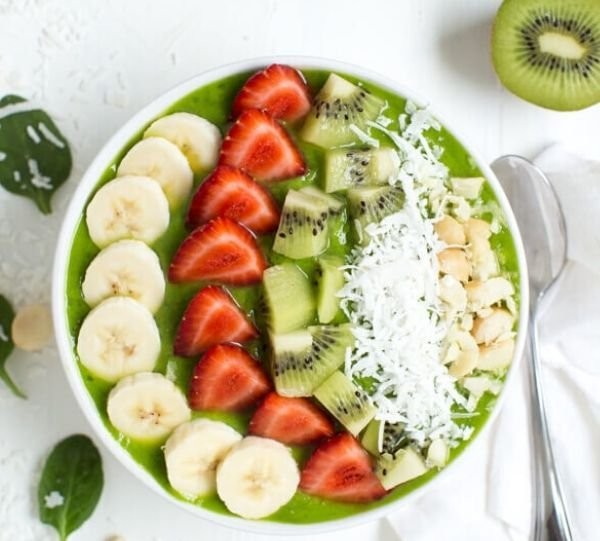
This tropical green smoothie bowl is a tasty way to start your day. It’s packed with fruits and greens. Plus, it’s quick to make and super refreshing!
How to Make Tropical Green Smoothie Bowl
This recipe is simple and fun. Just blend your ingredients together, pour it into a bowl, and add your favorite toppings. In no time, you will have a delicious smoothie bowl ready to enjoy!
Ingredients
- 1 cup fresh spinach
- 1 ripe banana
- 1/2 cup pineapple chunks
- 1/2 cup mango chunks
- 1/2 cup coconut water or almond milk
- Toppings: granola, sliced fruit, seeds
Directions
- In a blender, combine spinach, banana, pineapple, mango, and coconut water (or almond milk).
- Blend until smooth and creamy.
- Pour into a bowl and add your favorite toppings like granola, sliced fruit, or seeds.
- Enjoy your healthy breakfast or snack!
How to Serve Tropical Green Smoothie Bowl
You can serve this smoothie bowl for breakfast or as a refreshing snack. It’s also great as a light dessert. Just add your favorite toppings for a personal touch!
How to Store Tropical Green Smoothie Bowl
Store any leftover smoothie in an airtight container in the fridge. It will stay fresh for up to 24 hours. When you’re ready to eat it again, just give it a quick stir!
Tips to Make Tropical Green Smoothie Bowl
- Use frozen fruits for a thicker texture.
- Add a spoonful of nut butter for extra protein.
- Try adding a handful of avocado for creaminess.
- Experiment with different toppings for variety.
Variations
- Swap the spinach for kale for a different taste.
- Add a scoop of protein powder for more nutrients.
- Use orange juice instead of coconut water for a citrus twist.
FAQs
Can I make this smoothie bowl ahead of time? Yes, you can blend it and store it in the fridge for later.
Is this smoothie bowl healthy? Yes, it’s full of vitamins and nutrients!
Can I use other fruits? Absolutely! Feel free to use any fruit you like.