
There’s nothing quite like the smell of fresh bread filling your home. Yet, for many, the idea of kneading, proofing, and baking from scratch feels intimidating. Enter the humble bread machine, the countertop appliance that demystifies the entire process. With a simple “set it and forget it” approach, you can have a perfect loaf with minimal effort. Today, we’re mastering the basics with a classic, foolproof easy bread machine recipe for a soft, fluffy white bread that’s perfect for sandwiches, toast, or simply enjoying with a slather of butter.
Table of Contents
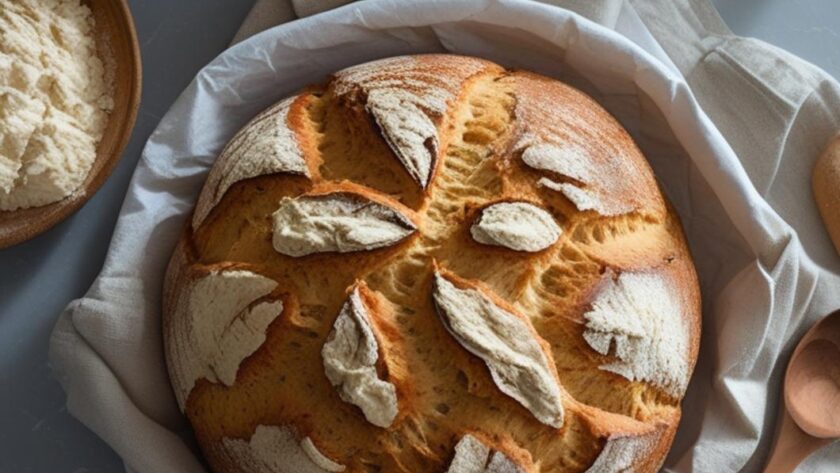
Classic White Bread Machine Loaf
Ingredients
- 1 cup plus 2 tablespoons lukewarm water (about 110°F)
- 2 tablespoons unsalted butter, softened or melted
- 3 cups bread flour
- 2 tablespoons granulated sugar
- 1 ¼ teaspoons salt
- 1 ½ teaspoons active dry yeast or bread machine yeast
Step-by-Step Instructions

1. Add the ingredients to your bread machine pan in the exact order listed by your manufacturer’s manual (usually liquids first, then dry ingredients, with yeast last). This precise order is crucial for a successful bake.
2. Carefully make a small well in the center of the flour mound and pour the yeast into it, ensuring it does not touch the liquid or salt directly at the start.
3. Secure the pan inside the machine, select the Basic/White Bread setting for a 1.5 lb loaf, and choose your preferred crust color (Medium is recommended).
4. Press start and let the machine do its work! This hands-off easy bread machine recipe requires no further input until you hear the finish signal.
5. Once the cycle is complete, immediately remove the bread pan using oven mitts. Gently shake the loaf out onto a wire cooling rack.
6. Allow the bread to cool completely for at least 1 hour before slicing. This prevents a gummy texture and ensures clean cuts.
Tips & Variations
- Herb & Garlic: Add 1 teaspoon of dried Italian herbs and ½ teaspoon of garlic powder with the dry ingredients.
- Honey Wheat: Substitute 1 cup of bread flour with whole wheat flour and replace the sugar with 2 tablespoons of honey (add honey with the wet ingredients).
- Dairy-Free: Use a plant-based milk alternative instead of water and swap the butter for an equal amount of neutral oil like canola or avocado oil.
Serving & Storage

This versatile loaf is perfect for classic peanut butter & jelly, hearty turkey clubs, or simply toasted with jam. For storage, keep the cooled loaf in a plastic bread bag at room temperature for up to 3 days. For longer storage, slice the entire loaf, place parchment paper between slices, and freeze in a heavy-duty freezer bag for up to 3 months. Toast slices directly from frozen.
Nutritional Benefits
This homemade bread contains no artificial preservatives or additives found in many store-bought loaves. Using bread flour provides a higher protein content, which contributes to better structure and a more satisfying texture. You control the sodium and sugar levels, allowing for a cleaner, customizable staple for your pantry.
Common Mistakes to Avoid
- Measuring Flour Incorrectly: The most common error. Always spoon flour into your measuring cup and level it off with a knife. Scooping directly packs the flour, leading to a dense, dry loaf.
- Using Old Yeast: Yeast loses potency over time. Test it by proofing in a little warm water with a pinch of sugar; if it doesn’t foam within 10 minutes, replace it.
- Opening the Lid: Resist the urge to check on the bread during the first rise and bake cycle. This lets out heat and steam critical for proper rising.
- Slicing While Hot: Cutting into a hot loaf causes steam to escape rapidly, resulting in a collapsed, gummy interior. Patience is key.
Final Conclusion
Mastering homemade bread doesn’t require advanced baking skills, just a trusty appliance and a reliable formula. This foundational easy bread machine recipe proves that with a few basic ingredients and the push of a button, you can achieve bakery-quality results in your own kitchen. Your bread machine is a gateway to endless culinary creativity, so don’t be afraid to experiment with the variations once you’ve perfected this classic white loaf. Happy baking!
FAQs
Can I use all-purpose flour instead of bread flour?
Yes, but the results will differ. Bread flour has a higher protein (gluten) content, which gives the loaf better structure and a chewier crumb. All-purpose flour will yield a softer, slightly more cake-like texture that may not rise as high.
My loaf collapsed in the middle. What happened?
A collapsed loaf is often caused by too much liquid, incorrect flour measurement (see Common Mistakes), or old yeast. Ensure you are using the precise measurements and fresh ingredients listed. High humidity can also affect flour absorption.
Do I have to use the bread machine’s entire cycle? Can I just use it to knead and rise?
Absolutely! Many bakers use the “Dough” setting on their machine to handle the mixing, kneading, and first rise. You can then shape the dough, let it have a second rise in a traditional loaf pan, and bake it in a conventional oven for a more artisanal shape and crust.
Why is my bread crust too hard or too thick?
Most bread machines have a crust color setting (Light, Medium, Dark). If your crust is too hard, select “Light.” You can also try removing the loaf 5-10 minutes before the baking cycle ends. Conversely, for a thicker crust, choose the “Dark” setting.
Can I add ingredients like nuts, seeds, or dried fruit?
Yes, but timing is crucial. Add these mix-ins when your machine beeps during the “Mix-In” cycle (usually indicated in the manual). Adding them with the initial ingredients can crush them or interfere with the gluten development.