
Are you craving something sweet, creamy, and irresistibly chocolatey? Look no further than these easy Oreo recipes that will satisfy your dessert cravings in no time! Whether you’re a beginner baker or a seasoned pro, these recipes are simple, delicious, and perfect for any occasion. From a 3 ingredient Oreo dessert to more elaborate treats, we’ve got you covered. Let’s dive into these mouthwatering creations that are sure to impress!
Table of Contents
3 Ingredient Oreo Dessert (No-Bake Oreo Truffles)
Creamy, Dreamy Oreo Truffles in Minutes
If you love Oreo cookies but want something even more indulgent, these 3 ingredient Oreo dessert truffles are the answer. With just Oreos, cream cheese, and chocolate, you can whip up a batch of these rich, fudgy bites that taste like they came from a fancy bakery. They’re perfect for parties, gifts, or just treating yourself!
Ingredients
– 1 package (14.3 oz) Oreo cookies (about 36 cookies)
– 8 oz cream cheese, softened
– 12 oz semi-sweet or white chocolate, melted (for coating)
Step-by-Step Instructions
1. Crush the Oreos: Place the entire package of Oreos (filling included) in a food processor and pulse until they turn into fine crumbs. If you don’t have a food processor, place them in a ziplock bag and crush them with a rolling pin.
2. Mix with Cream Cheese: In a large bowl, combine the Oreo crumbs with the softened cream cheese. Use a hand mixer or spatula to mix until fully incorporated and the mixture holds together when pressed.
3. Roll into Balls: Scoop about 1 tablespoon of the mixture and roll it into a ball. Place each truffle on a parchment-lined baking sheet.
4. Chill the Truffles: Refrigerate the truffles for at least 30 minutes to firm up. This step is crucial to prevent them from falling apart when dipping.
5. Melt the Chocolate: While the truffles chill, melt the chocolate in a microwave-safe bowl in 30-second intervals, stirring between each interval until smooth.
6. Dip the Truffles: Using a fork or dipping tool, dip each truffle into the melted chocolate, ensuring it’s fully coated. Tap off any excess chocolate and place them back on the parchment paper.
7. Set the Chocolate: Let the truffles sit at room temperature for about 10 minutes, then refrigerate for another 15 minutes to set the chocolate completely.
8. Serve and Enjoy: Once set, these easy Oreo recipes are ready to devour! Store any leftovers in the fridge.
Tips & Variations
– Flavor Twists: Swap the classic Oreos for mint, peanut butter, or golden Oreos for a fun variation.
– Decorations: Drizzle the truffles with contrasting chocolate (white chocolate over dark or vice versa) or sprinkle with crushed Oreos, sprinkles, or sea salt.
– Vegan Option: Use vegan cream cheese and dairy-free chocolate to make these truffles plant-based.
Serving & Storage
– Serving: Arrange the truffles on a platter or in mini cupcake liners for an elegant presentation. They pair perfectly with a glass of milk or a cup of coffee.
– Storage: Keep the truffles in an airtight container in the refrigerator for up to 1 week. For longer storage, freeze them for up to 3 months. Thaw in the fridge before serving.
– Meal Prep: These truffles are great for making ahead. Prepare them a day or two before your event to save time.
Nutritional Benefits / Advantages
While these truffles are undoubtedly a treat, they do offer a few perks:
– Quick Energy Boost: The combination of carbs and fats provides a quick source of energy.
– Calcium: Thanks to the cream cheese, you get a small dose of calcium.
– Portion Control: Since they’re bite-sized, it’s easier to enjoy a small indulgence without overdoing it.
Common Mistakes to Avoid
– Overprocessing the Oreos: Pulse the Oreos just until they’re fine crumbs. Overprocessing can turn them into a paste, making the truffles too dense.
– Skipping the Chill Time: If you don’t chill the truffles before dipping, they’ll fall apart in the melted chocolate.
– Using Cold Cream Cheese: Make sure the cream cheese is fully softened to avoid lumps in your mixture.
– Melting Chocolate Too Quickly: Chocolate can seize or burn if microwaved too long. Heat it in short bursts and stir well between intervals.
Conclusion for this Recipe
These 3 ingredient Oreo dessert truffles are proof that you don’t need a long list of ingredients to create something extraordinary. Whether you’re whipping up a last-minute dessert or planning a special treat, these truffles are a foolproof choice. Plus, they’re a fantastic addition to your collection of easy Oreo recipes that everyone will love.
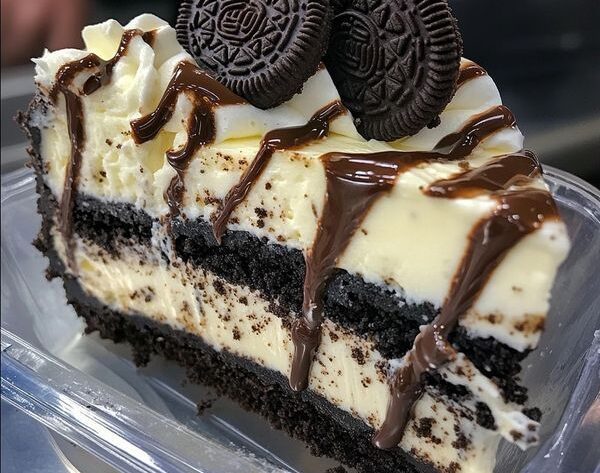
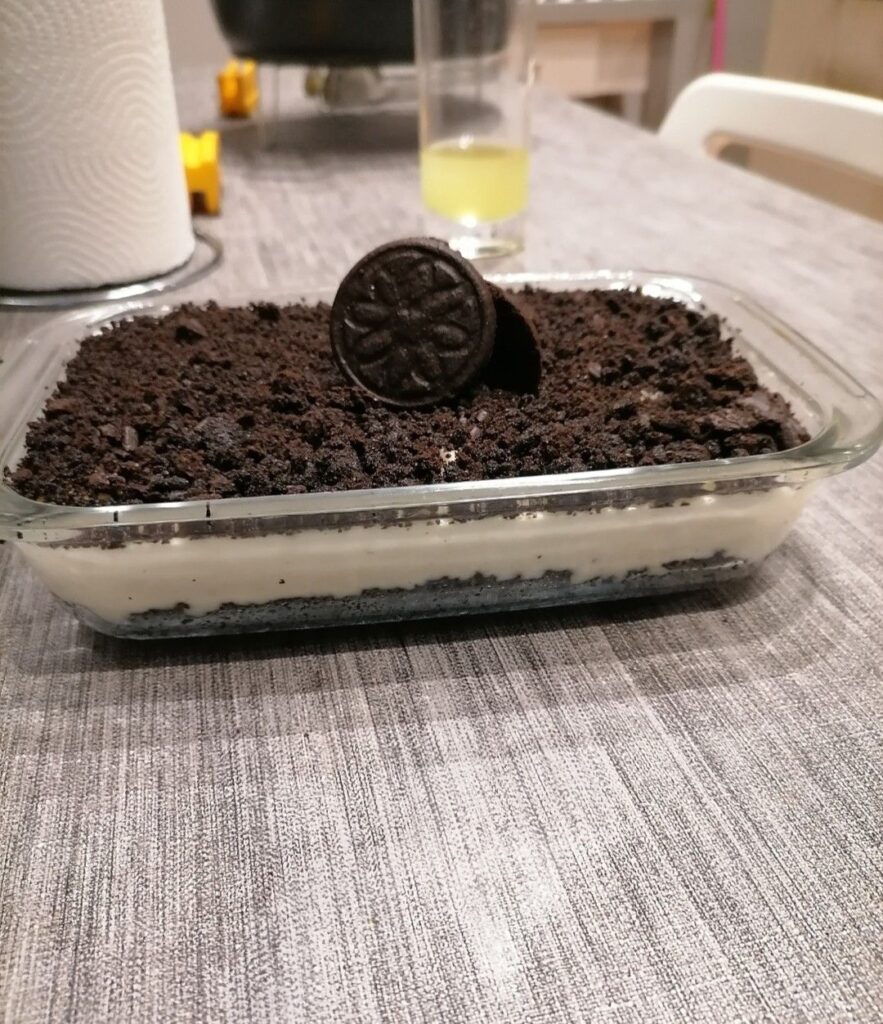
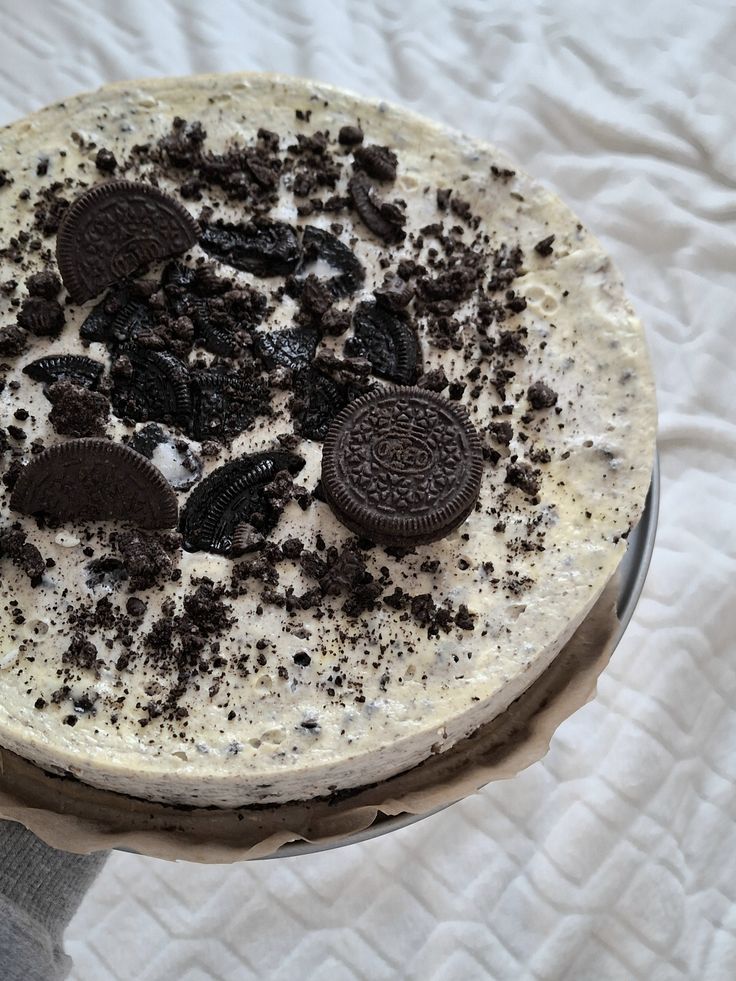
Oreo Icebox Cake (No-Bake Layered Dessert)

Cool, Creamy, and Irresistibly Layered
If you’re looking for a show-stopping dessert that requires zero baking, this Oreo icebox cake is your answer. Layers of Oreos and whipped cream come together to create a dessert that’s as easy to make as it is delicious. It’s the perfect make-ahead treat for summer parties or holiday gatherings!
Ingredients
– 1 package (14.3 oz) Oreo cookies
– 2 cups heavy whipping cream, chilled
– 1/4 cup powdered sugar
– 1 tsp vanilla extract
– Optional: Chocolate shavings or cocoa powder for garnish
Step-by-Step Instructions

1. Whip the Cream: In a large bowl, combine the heavy whipping cream, powdered sugar, and vanilla extract. Use a hand mixer or stand mixer to whip the cream until stiff peaks form.
2. Layer the Oreos: Choose a serving dish (a loaf pan or 8×8-inch dish works well). Spread a thin layer of whipped cream on the bottom. Arrange a single layer of Oreos on top, slightly overlapping if needed.
3. Add Whipped Cream: Spread a generous layer of whipped cream over the Oreos, ensuring they’re fully covered.
4. Repeat Layers: Continue alternating layers of Oreos and whipped cream until you’ve used up all the ingredients. End with a layer of whipped cream on top.
5. Chill Overnight: Cover the dish with plastic wrap and refrigerate for at least 6 hours, preferably overnight. This allows the Oreos to soften and the flavors to meld together.
6. Garnish and Serve: Before serving, garnish with chocolate shavings, cocoa powder, or crushed Oreos. Slice and enjoy this easy Oreo recipe!
Tips & Variations
– Flavor Variations: Use different Oreo flavors like mint or peanut butter for a unique twist.
– Add Ins: Fold in mini chocolate chips or crushed candy bars into the whipped cream for extra texture.
– Dairy-Free Option: Use coconut whipped cream instead of heavy cream for a vegan-friendly version.
Serving & Storage
– Serving: This dessert is best served chilled. Use a sharp knife to slice clean pieces, wiping the knife between cuts for a neat presentation.
– Storage: Keep the icebox cake covered in the refrigerator for up to 3 days. It’s not recommended for freezing, as the texture of the whipped cream may change.
– Meal Prep: This is the ultimate make-ahead dessert. Prepare it the day before your event for stress-free entertaining.
Nutritional Benefits / Advantages
– Light and Airy: The whipped cream makes this dessert feel lighter than traditional cakes.
– Portion-Friendly: Since it’s served in slices, it’s easy to control portion sizes.
– No Baking Required: Perfect for hot days when you don’t want to turn on the oven.
Common Mistakes to Avoid

– Underwhipping the Cream: The cream must reach stiff peaks to hold the layers together. Underwhipped cream will make the cake collapse.
– Skipping the Chill Time: The Oreos need time to soften and absorb the moisture from the cream. Skipping this step will result in a crunchy, less cohesive dessert.
– Using Room Temperature Cream: Chilled cream whips up better and holds its shape longer.
Conclusion for this Recipe
This Oreo icebox cake is a crowd-pleaser that’s as easy Oreo recipes as it gets. With just a few ingredients and no baking required, it’s a stress-free way to impress your guests. Plus, it’s a great make-ahead option for busy hosts. If you loved the 3 ingredient Oreo dessert, this layered delight is another must-try!
—
Final Conclusion
Oreo cookies are a versatile ingredient that can be transformed into countless decadent desserts with minimal effort. From the 3 ingredient Oreo dessert truffles to the layered icebox cake, these easy Oreo recipes prove that you don’t need to be a pastry chef to create show-stopping treats. Whether you’re craving something rich and fudgy or light and creamy, there’s an Oreo dessert for every occasion.
The best part? These recipes are beginner-friendly, require minimal ingredients, and deliver maximum flavor. They’re perfect for last-minute gatherings, holiday parties, or simply satisfying your sweet tooth. So, grab a pack of Oreos and get creative in the kitchen—your taste buds will thank you!
FAQs
1. Can I use reduced-fat cream cheese for the Oreo truffles?
While you can use reduced-fat cream cheese, full-fat cream cheese will give you a creamier and more stable texture. Reduced-fat versions may make the truffles softer and harder to dip.
2. How far in advance can I make the Oreo icebox cake?
You can make the icebox cake up to 2 days in advance. In fact, it tastes even better after sitting in the fridge for a day or two, as the flavors meld together.
3. Can I freeze Oreo truffles?
Yes! Oreo truffles freeze beautifully. Store them in an airtight container with parchment paper between layers to prevent sticking. Thaw in the fridge before serving.
4. What’s the best way to crush Oreos without a food processor?
Place the Oreos in a ziplock bag and use a rolling pin to crush them into fine crumbs. You can also use a meat mallet or the bottom of a heavy pan.
5. Can I use cool whip instead of homemade whipped cream for the icebox cake?
Absolutely! Cool whip is a convenient alternative, though homemade whipped cream tends to have a lighter and fluffier texture. If using Cool whip, thaw it in the fridge before assembling the cake.